When I was about seven or eight years old, my mom made a gingerbread house. I don't remember much about the house. I think she baked it herself and I'm pretty sure my brother and I didn't help her decorate it. What I do remember is eating it. She let me and my brother invite all our friends over to dismantle it. I remember tons of laughing, sugar and crumbs all over the table and floor, and thinking that this was the greatest thing in the world. I'm pretty sure my brother and friends thought so too.

This year my mom bought me a pre-made gingerbread house to decorate. As a kid, the gingerbread house was all about the gluttony, as an adult it's all about creativity, artistry, and decorating (except for Eric who just wants to eat it). My mom usually "makes" a gingerbread house every year--she decorates pre-made houses because baking the gingerbread and getting the pieces to fit together is a pain in the ass. I have not even made my own gingerbread cookies, let alone attempted to bake a house. Maybe one day. However, I had so much fun decorating my house that I can't wait to do it again next year and make it an annual tradition. I even got Eric to help out a little.
So I'm not going to share a gingerbread recipe with you. Just share a few decorating ideas. I started with the pre-made gingerbread house made and sold by Target. My mom brought me coconut M&Ms, colored sugar, regular sprinkles, sprinkles shaped like holly leaves and berries, sprinkles shaped like candy canes, heart-shaped candies, coconut flakes, and Wilton's Sparkle Gel, green and black.
A lot of what I did was pretty basic. I put green and white M&Ms on the roof, red gum drops on the very top, mini bead candy and icing icicles on the edges. I wanted to do Big Red gum as shingles, but Eric vetoed that idea because it'd make the roof inedible. The path is made out of brown M&Ms, green mini beads, and broken peppermint candies. I outlined the doors and windows with frosting or sprinkles. But the more I got into it, the more creative I got.
I put candles in the window in the front of the house. I used a red sprinkle for the stick, a small yellow sprinkle for the flame, and two holly leave sprinkles for the base of the candle. It took a lot of patience but turned out pretty good.
 |
| Candles in the windows. |
Using the holly sprinkles, I decorated the front door and back windows.
 |
| Holly in the windows. Jelly bean scrubs. |
I also made two wreaths for the house out of the holly sprinkles. On the front of the house I built the wreath on a peppermint candy. Toothpicks and the sparkle gel made the job possible. But the sparkle gel takes a ridiculous amount of time to dry and harden (I don't think it's really meant to harden). Even though I let my wreath sit for hours before attaching it to the house, the leaves on the wreath began to slide off so my wreath isn't actually circular but at least they didn't fall completely off.
 |
| Peppermint wreath |
On the back of the house I just drew a circle of frosting on the wall and applied the leaves and berries. It was much easier, quicker, and sturdier.
 |
| Frosting wreath |
I gave the side windows shutters by using a meat tenderizing mallet to flatten and shape the red gumdrops. The gumdrops will stick horribly so use granulate sugar on your work surface. After I made the shutter, I used the sparkle gel to glue on sprinkle candy canes on two of the shutters, and holly leaves on the other two shutters.
 |
| Gum drop shutters with candy cane accents. Jelly bean scrubs. |
 |
| Gum drop shutters with holly leaf accent. Jelly bean shrubs. |
Probably the coolest thing I did was make a Christmas tree on the side of the house. I cut the spearmint leaves in thirds, flattened them with a mallet, and then cut them into a bunch of little triangles. With frosting I attached the triangles to the side of the house to make the tree. Wilton gives a good
tutorial on how to do this. I then used sparkle gel and red holly sprinkles to decorate the tree. On the sides and back of the house I made little shrubs by flatten and shaping green jelly beans.
 |
| Spearmint leaf tree with holly berry decorations. |
Eric made a snowman out of the mini marshmallows. If you keep pulling and stretching a marshmallow, it turns into a very sticky taffy like substance (Eric taught me this). So what he did was turn a bunch of marshmallow into taffy. He made two balls and rolled them in powdered sugar so they weren't so sticky. He skewered them on a toothpick and then added a mini marshmallow on top as the head. Spaghetti pasta made up the arms. He used a sprinkle as the carrot nose. Then with a toothpick and the black sparkle gel, he drew on a face and buttons. After I learned my lesson with the peppermint wreath, we put the snowman in the freezer so the gel would set. Eric was also nice enough to do some of the roof for me after my carpel tunnel locked up my hands.
 |
| Marshmallow Snowman |
I covered the cardboard base with royal icing that I made myself. All you need is one egg white, a tiny pinch of tartar, and 1.5 cups of powdered sugar. Beat the egg white and tartar on high until it becomes frothy then gradually add the powdered sugar until peaks form. Because the frosting contains raw egg, you're not suppose to eat it. However, I grew up on this frosting and use it on sugar cookies as did the many women who came before me; the raw egg doesn't bother me or Eric. If you do decide to eat this frosting, know you're risking salmonella poisoning. I sprinkled coconut flakes on top of the frosting for snow and I was done!\
 |
| Front |
 |
| Side |
 |
| Side |
 |
| Back |
Enjoy!
~Eric
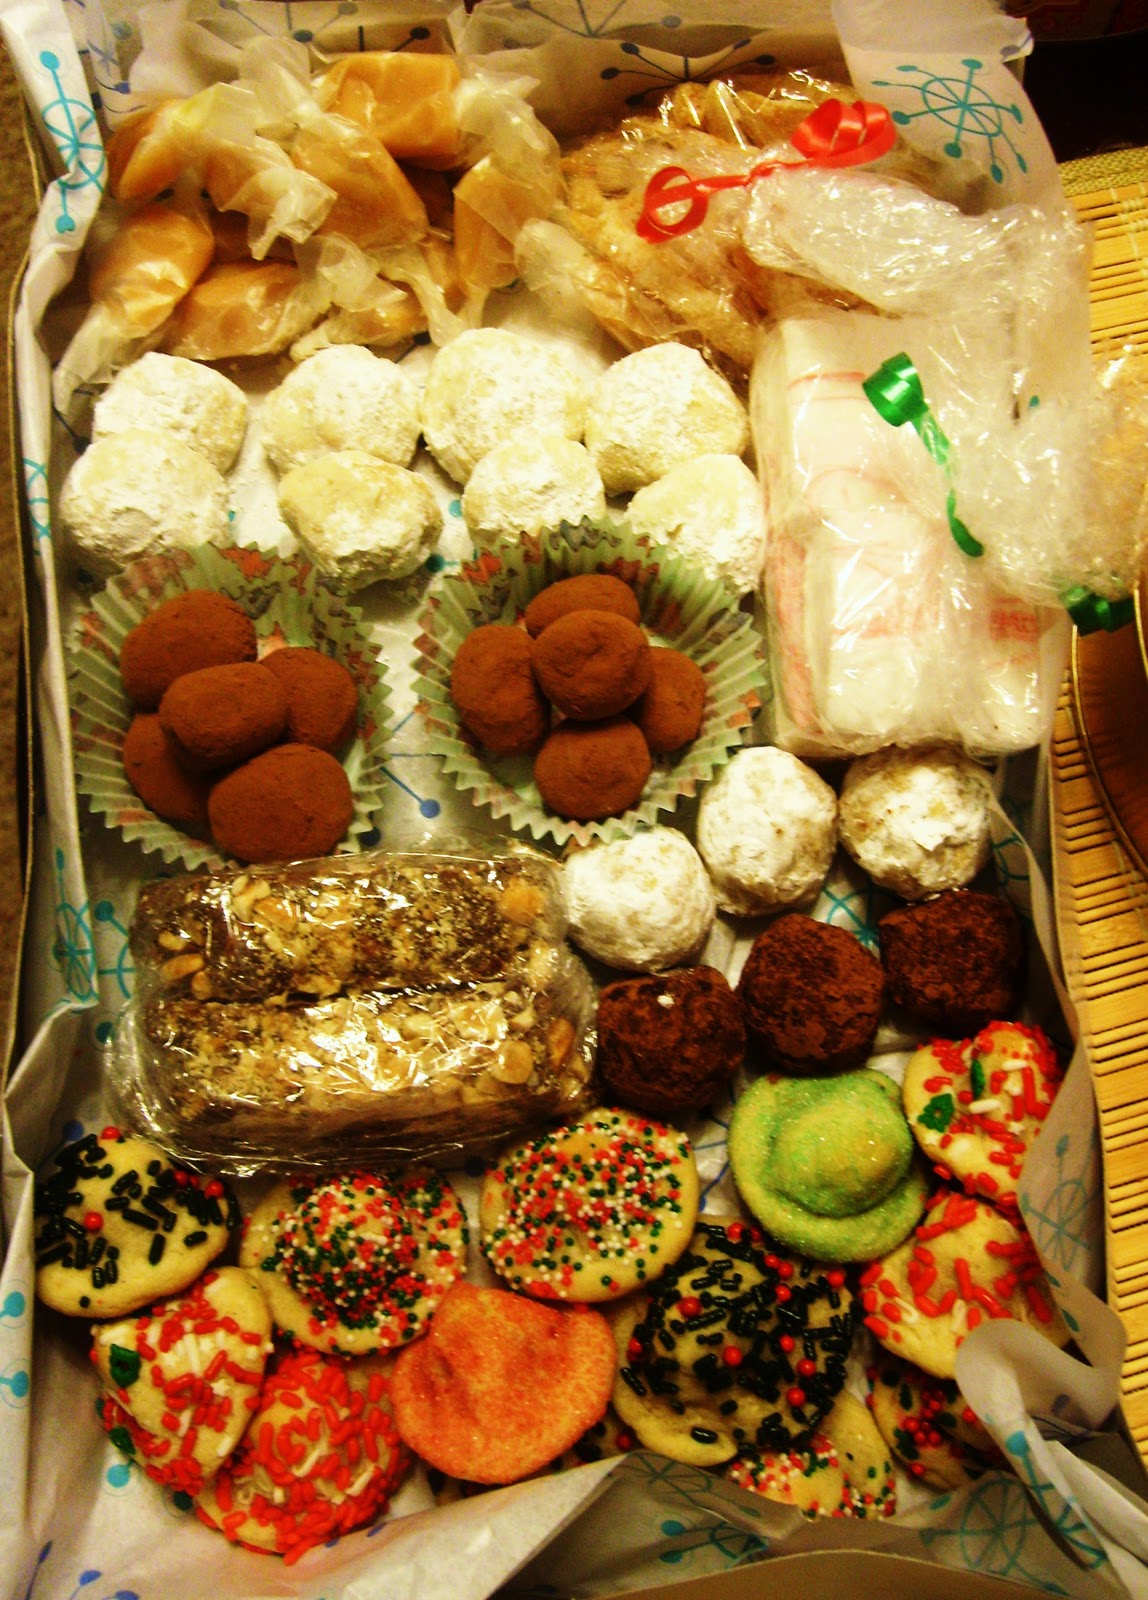
2011 Christmas Baking List:
Mint-Chocolate Truffles
Starlight Mint Cake
Sea Salt Caramels
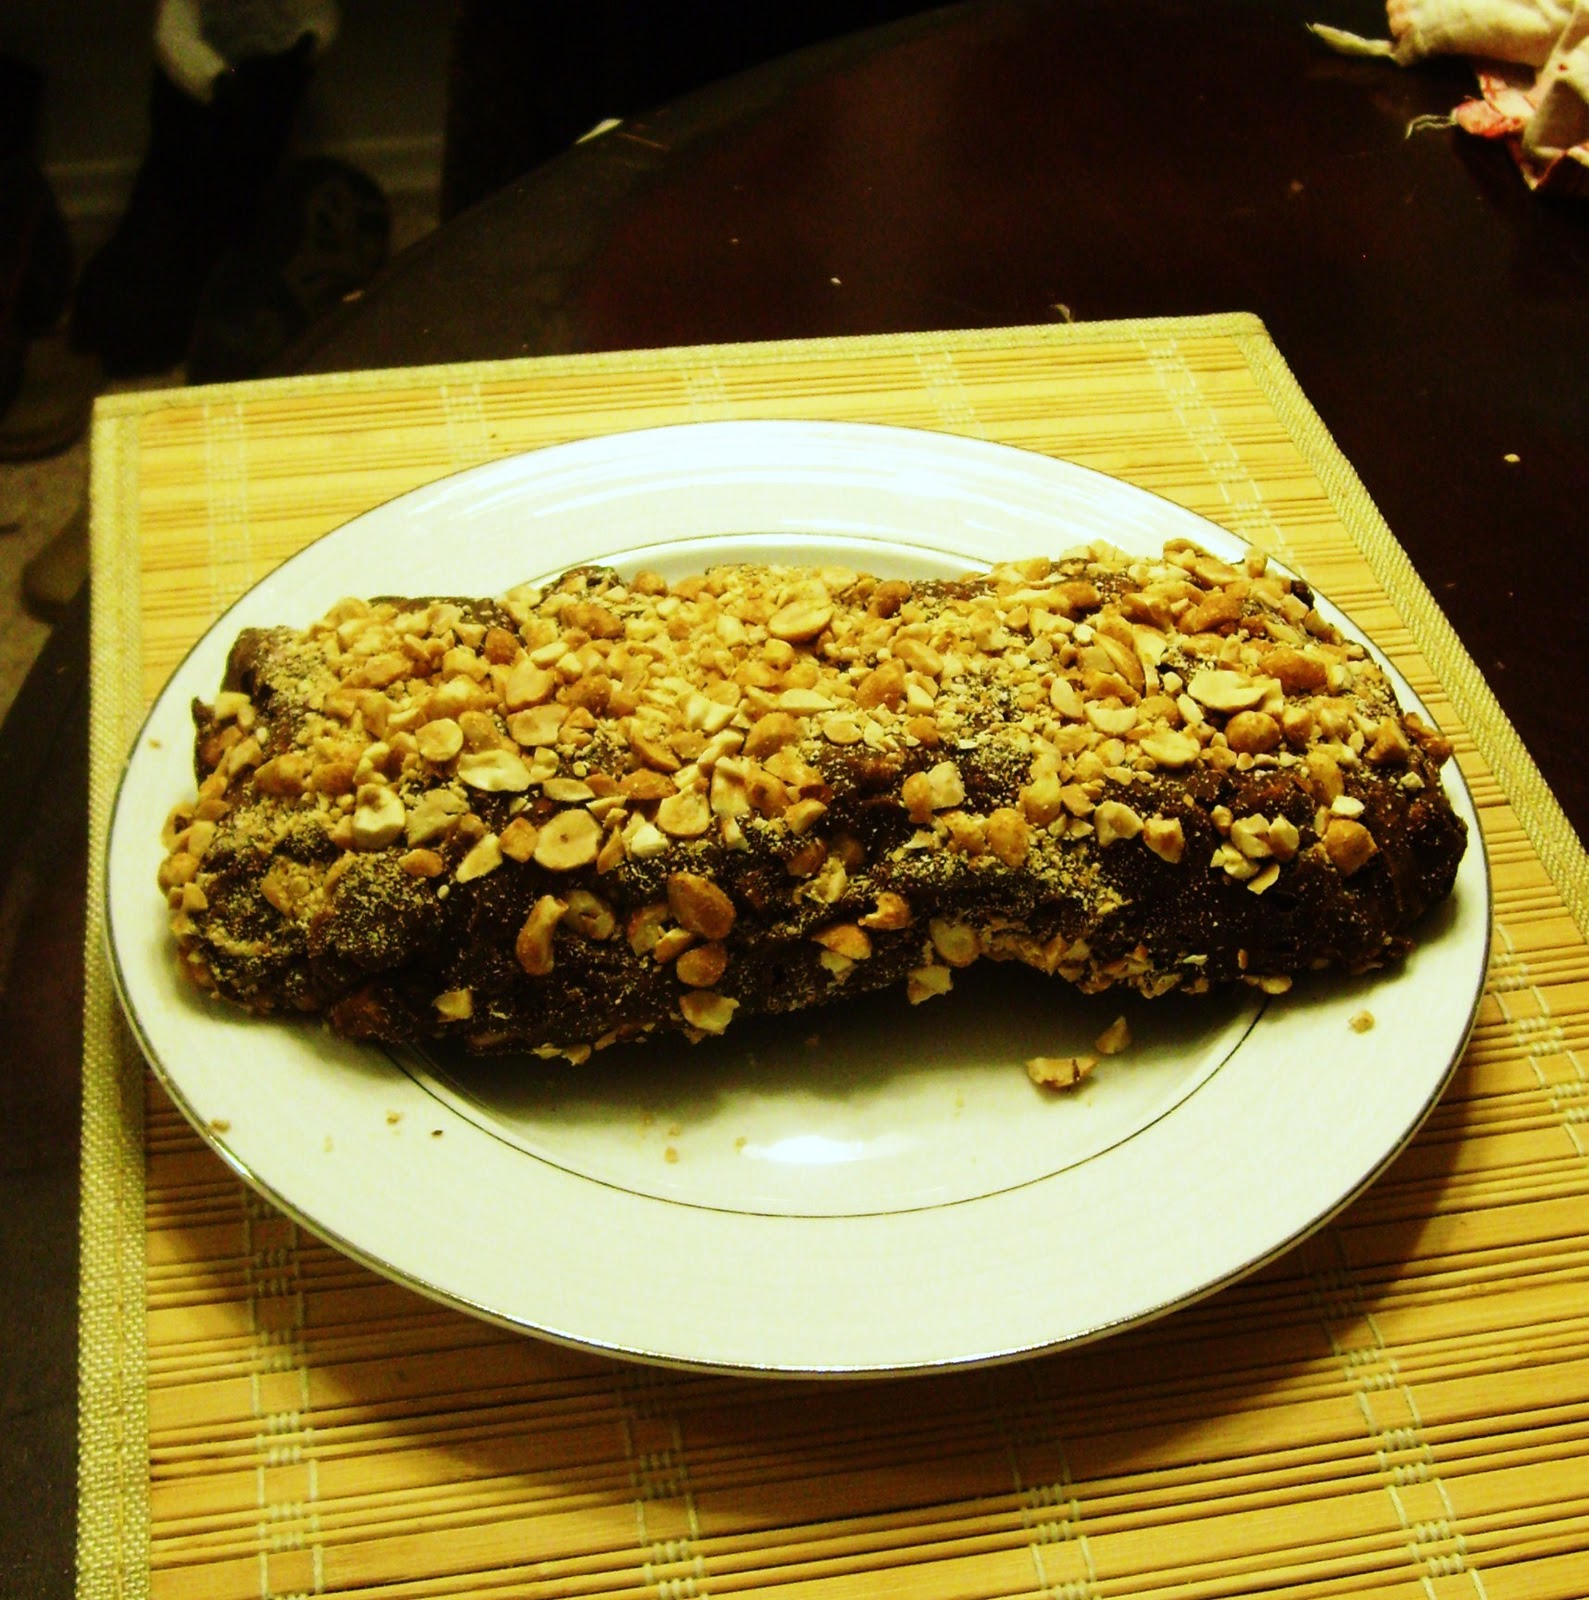
Rocky Road Chocolate Log
Candied Citrus Peels
Easy Rum Balls
Homemade Marshmallows
Christmas Kiss Cookies
Tea Cookies
Other Holiday Cooking Ideas:
Snowflake Tortillas
Christmas Peep S'mores


 2011 Christmas Baking List: