Monday, February 18, 2013

Homemade Tootsie Rolls

http://farm2.staticflickr.com/1207/768595072_55c01c3f7a.jpg
Source

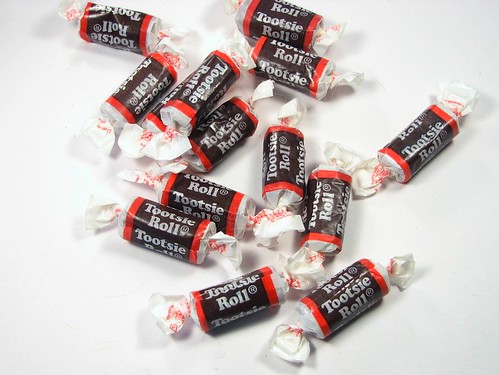
Every since I made my first homemade caramels, I've loved candy making. I've made sea salt caramels, pumpkin caramels, marshmallow, truffles, chocolate covered cherries, candied citrus peels, candy corn, different types of fudge, and bon-bons. (Click here for candy recipes). So when I saw this tootsie roll recipe on Pinterest, I had to try it.


Ingredients:
1/2 cup honey
1/4 cup plus 2 tablespoon cocoa powder, sifted
1 teaspoon vanilla extract
1 tablespoon butter, melted
1/4 cup powdered sugar, sifted
pinch of salt
1 to 2 cups instant non-dry milk powder

Directions:
In a large bowl, mix together honey, cocoa powder, and vanilla using a spatula or spoon. Pour in melted butter and mix well. Add powdered sugar and salt; mix until well incorporated.

Add the milk powder 1/4 cup at a time until dough forms. Remove the dough from the bowl and onto a work surface. Knead the dough by hand and continue to add the milk powder until the dough becomes firm. You may not use all of the milk powder. When the dough is firm and only slightly sticky, roll it into a ball. Spray cling wrap with cooking spray and wrap the dough in it.

Let the dough rest for a 1 to 2 hours. I cut the dough into strips. Next time, I think I'll roll them out into logs then cut them into pieces. Wrap in wax paper and store at room temperature.

Enjoy!

~Krissy

Sunday, February 17, 2013

Rice Crispy Birthday Cake

Happy Birthday Eric!


Yesterday was Eric's 27th birthday. Before I give you the recipe to his birthday cake, let's take a minute to walk down memory lane. When Eric saw his cake, he smiled and laughed and made a comment that I always make him unusual birthday cakes. Thinking back on it, he's right.

There was the orange-cranberry bread cake with blue royal frosting. It was made from a Pillsbury quick bread mix. I can't remember why I made this for his birthday, but I do know it was before I had a large repertoire of recipes in my arsenal. However, Eric loved it.

https://sphotos-b.xx.fbcdn.net/hphotos-prn1/19631_1235251399950_4685524_n.jpg
Orange Cranberry Bread Cake

Then there was the strawberry cake (also from a mix) with the candy clay decorations. We had friends over to celebrate and they all wanted to eat the candy clay roses. I also made cheese puffs and cream cheese rangoons as appetizers.

Strawberry Cake
Last year was the apple cider cake, which is one of my all times favorite cakes. It's a doctored spice cake mix. Sadly apple cider isn't in season in February so I had to use an apple cider mix--which is good but not nearly as good as the real thing. The following autumn, I made apple cider cupcakes with real apple cider and they were amazing.

Apple Cider Cake
And that brings us to this year, a rice crispy cake. A few weeks ago, Eric mentioned that rice crispy treats sounded good (his hint that I should make some). That's when I remembered seeing a Martha Stewart rice crispy cake and knew I had to make it for him. I used Kellogg's rice crispy treat recipe and made a minor change to Martha's chocolate marshmallow frosting.


Rice Crispy Cake
Ingredients:
6 tablespoons butter
8 cups mini marshmallows
12 cups rice crispy cereal

Directions:
Spray 2 8-inch round cake pans generously with cooking spray. Set aside.

In a stock pot, melt butter over low heat. Add the marshmallows. Stir until the marshmallows are completely melted then remove from hear. Add rice crispies and stir gently but well until the cereal is well coated.

Divide the mixture between the two cake pans and evenly press the mixture into the pan.


Allow to cool then remove from pans.

Chocolate Marshmallow Frosting
Ingredients:
1 1/2 tablespoon butter
4 1/2 cups mini marshmallows
1 cup semisweet chocolate chips

Directions:
In a medium saucepan melt butter over medium-low heat. Add marshmallows and stir. Just as the marshmallows begin to melt, add the chocolate chips. Stir until the mixture is smooth.


While the frosting is still warm, frost the top of the first cake layer. Let the frosted cake stand for 5 to 10 minutes. Set the second cake layer on top and gently press down. 


Decorate as desired. Martha used different cereals to decorate her cake. Eric's cake looks a bit Christmasy just because I used what I had on hand--black, green, and red gels. 


I have to admit, this makes a pretty cool cake. It's quick, easy, and different. I know I will be making this again.


Enjoy!

~Krissy

Skinny Peanut Butter Brownies

http://blog.krrb.com/wp-content/uploads/2013/02/Vintage-I-Yam-Crazy-About-You-Valentines-Day-Card-640x651.jpg
Source
https://blogger.googleusercontent.com/img/b/R29vZ2xl/AVvXsEikwpP1a-eH8kVie9DaPvp-3TQBNb7-In1pOAoXBm7ndR5TC2bh92oZOh313JFaCCIs1stNXMw8uGodxZqgFt2ai9s7kFIgaBJ4Yua5l3N7KYJ8QwlRBEU39WUXHA8XGLkR2v_HQwponVg/s1600/SteamyValentine.jpg
Source

https://blogger.googleusercontent.com/img/b/R29vZ2xl/AVvXsEi4BVTLzwIJNLjt64TIHDyGUDRN3xobw7td3MCRX0RmvUoBqzlhu9hyphenhyphenG6jwJjOM0VqxX2Xws5ZKQ_1OTgkEog3ZwqMFLe2Yw4uij5kBF3Pa5bGal4zn54HSZkNBJOA5lgDIDy2Z_gElSMs/s1600/IMG_0003.jpg
Source
So I've been M.I.A. for the last month and a half. With work and wedding planning, I haven't been spending very much time in the kitchen. However, for Valentine's Day I managed to find time to make these delicious, fudgy brownies. Not only are the yummy--decadent really--they are semi-healthy (or at least not super bad for you). You see, Eric and I joined a gym at the beginning of the year so we can look all tone and fit for our wedding. These brownies make us feel a little less guilty for indulging in our sweet tooth. Plus, these are the easiest made-from-scratch brownies ever. You just throw the ingredients into a food processor or blender! Easy to make, easy to clean up.


Original Recipe (I made a few minor changes).

Ingredients:
1 cup creamy peanut butter
2/3 cup vanilla yogurt (I used Greek yogurt)
1/4 cup skim milk
1 egg
dash of salt
1 teaspoon baking powder
1 cup sugar
1/2 cup cocoa powder
1/2 cup old-fashioned rolled oats

Directions:
Preheat oven to 350. Spray an 8x8-inch pan with cooking spray and set aside.

Pour the rolled oats in the food processor or blender and blend until the oats are ground up. Add the rest of the ingredients to the food processor, except for the peanut butter. Blend until the mixture is smooth.


Pour the batter into the baking dish. Beware: it will be thin but that's okay. Microwave the peanut butter for 30 or until it's melted. Drop spoonfuls of peanut butter into the batter and using a butter knife, swirl the peanut butter to give the brownies a marbled effect. Don't over mix.


Bake for 20 to 25 minutes. You will notice the edges of the brownies pull away from the sides of the pan when it's baked. Allow the brownies to cool completely and serve.

Eric had no idea that these were skinny brownies until I told him. Even I was surprised by how rich and fudgy they turned out.

Enjoy!

~Krissy

Also Check Out:
Healthified Chocolate Chocolate Chip Cookies
Skinny Chocolate Chip Cookies