Tuesday, September 25, 2012

Pumpkin Chocolate Chip Brownies


Tumblr_laua26uc9l1qeukb6o1_500_large
Source
I have been searching and searching for a fudgy, chewy pumpkin brownie recipe for what seems like forever. Last year I made pumpkin swirl brownies. They contained cayenne pepper and were absolutely delicious. I may or may not have eaten the entire pan myself. And while I liked them plenty, they still had a more cake-like consistency than brownie. I thought I finally found one, but after reading through the comments, it was another cakey brownie. So I decide that I would just have to come up with one on my own. There is a science, a chemistry, to baking that I only kind of understand. So I looked at bunch of brownies recipes and formed my own pumpkin brownie using their proportions as a guideline. I crossed my fingers, popped it in the oven, and prayed it turned out edible. It not only turned out edible but oh-my-god good. The consistency was exactly what I had been looking for and the taste was out of this world.


Ingredients:
1/2 cup unsalted butter, softened
1 cup brown sugar, packed
1 teaspoon pumpkin pie spice
1/4 tsp salt
1 large egg
1/2 cup pumpkin puree
3/4 cup all purpose flour
1 cup dark chocolate chips

Directions: 
Preheat oven to 350 degrees. Spray an 8x8-inch baking dish with cooking spray. Sift the flour into a small bowl and set aside.

Cream the butter and sugar together in a large bowl until the mixture is light and fluffy. Beat in the pumpkin pie spice, salt, egg, and pumpkin puree. Gradually stir the flour into the wet ingredients and combine well. Add the chocolate chips and stir. Pour the batter into the baking dish.

Bake for 20 to 25 minutes or until the brownies are lightly browned on the edges and the center is set. Allow to cool in the pan. 


Enjoy!

~Krissy


Also Check These Fall Recipes:  
Acorn Donuts
Applesauce Cookies with Caramel Frosting
Cheese Tortellini in a Pumpkin Sauce
Cinnamon-Sugar Pastry with Pumpkin Dip
Mini Pumpkin Pies
Pumpkin Bread!
Pumpkin Lasagna Rolls
Pumpkin Penn Casserole
Pumpkin Caramels! 

Saturday, September 22, 2012

Pumpkin Caramels!

Happy First Day of Autumn!

“купаться в золоте” by Lesya Pchelka


Source
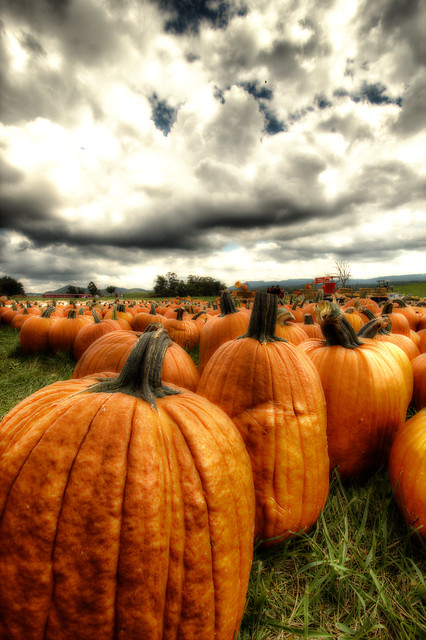
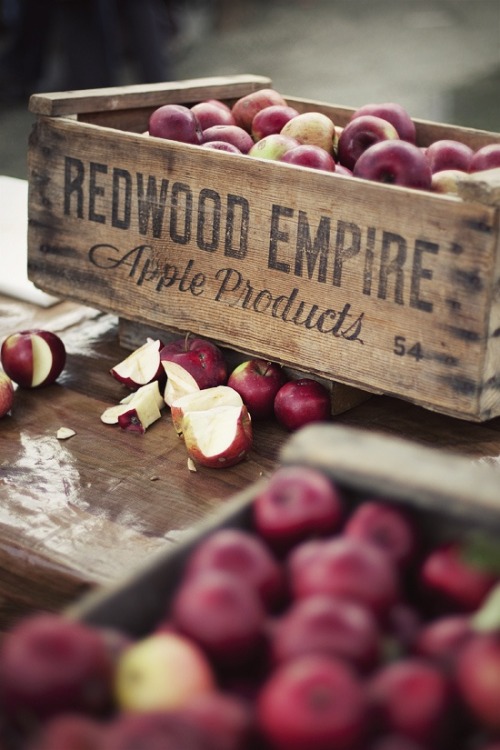
I don't think there is anything about autumn that I don't love. I mean, fall has the best weather, the best clothes, the prettiest foliage, not to mention Halloween. It is without a doubt my favorite time of year. It's also when I'm most inspired to cook. I can't go to the grocery store without gasping at all the pumpkins, squashes, and apples.

https://blogger.googleusercontent.com/img/b/R29vZ2xl/AVvXsEii7TF_3Cqh4NI0HvjoM6QB427p6Xvuw8kjomPTwpOPit71pMjMGetlZ5CW0QDha91AX_iaN_WBiDuKdTPtY58gIyZnDTXrkdQFP1wI6BkQwrwrZC40GIQPS9bdTV_rhpWUcdsbZZqIr4mB/s1600/aut6.bmp
Source

Source

Source

Source
Now there's some autumn recipes that I have to make every year. Top on the list is my Cinnamon-Sugar Pastries with Pumpkin Dip. Eric absolutely loves it. I'll probably make it at least twice before Thanksgiving just for him. And we always carve pumpkins which mean Roasted Pumpkin Seeds.

Then I have to make my Baked Potato Soup. It just screams out fall. Since apple cider will (finally) be in season, I must remake my Apple Cider Cake that I baked in February for Eric's birthday; this time with real apple cider instead of the powdered mix. But I also have a list the length of my arm (only a slight exaggeration) of new recipes to test out this autumn season. And chances are it's only going to continue to grow. I'm sure I won't get to them all, but I'll try my damnedest, beginning with . . . Pumpkin Caramels!


I made sea salt caramels last Christmas and they were amazing. I gave them as gifts and had to hide them from Eric or else he would have eaten them all. Everyone loved them. I had never even heard of pumpkin caramels until Pinterest. I tracked down a recipe that appealed to me, made a few changes, and here it is. Who knew homemade caramels could get any better?


Ingredients: 
1 1/2 cups heavy cream
2/3 cup pumpkin puree
1 teaspoon pumpkin pie spice
2 cups white sugar
1/2 cup light corn syrup
1/3 cup maple syrup
1/4 cup water
4 tablespoon unsalted butter, cut in chunks
1 teaspoon lemon juice

Directions:
Line an 8x8-inch glass baking pan with wax paper and grease it with butter. Set aside.

In a medium sauce pan, heat the heavy cream, pumpkin puree, and pumpkin pie spice over medium-high heat. Stir and combine well. You want to get the mixture hot but not boiling. Remove from heat and set aside.

In a large heavy-bottomed pan with sides that are at least 4 inches high (I used a stock pot), combine the sugar, maple syrup, corn syrup, and water. Over medium-high heat, bring to a boil, stirring continuously. Once the sugar is completely dissolved, continue to cook the mixture until it reaches 248 degrees on a candy thermometer. Occasionally swirl the saucepan but refrain from stirring the mixture.

When the temperature reaches 248 degrees, slowly and carefully stir in the cream-pumpkin mixture. The mixture will bubble so be careful not to burn yourself. When the caramel reaches 230 degrees, stir continuously. When the temperature hits 244, remove from heat, and stir in butter chunks and lemon juice. Continue to stir until the butter is completely incorporated into the caramel.

Pour the caramel into the prepared pan. Allow the caramel to cool and set for at least 2 hours. Cut into 1-inch squares and wrap the pieces in wax paper.


I cannot even begin to describe how amazing these caramels are. I may have to make a second batch for Thanksgiving.


Enjoy!

~Krissy


Also Check These Fall Recipes:  
Acorn Donuts
Applesauce Cookies with Caramel Frosting
Cheese Tortellini in a Pumpkin Sauce
Cinnamon-Sugar Pastry with Pumpkin Dip
Mini Pumpkin Pies
Pumpkin Bread!
Pumpkin Lasagna Rolls
Pumpkin Penn Casserole
Pumpkin Chocolate Chip Brownies

Friday, September 21, 2012

Fluffernutter Mug Cake

Marshmallows make anything better, at least in my opinion. When Eric and I were up north at my parents' cabin last summer, we stopped by Dairy Queen for some ice cream. For the first time I saw marshmallow fluff as a sundae topping. Best sundae of my life. So I saved my favorite mug cake for last.

This recipes comes from here with some minor alterations. 

Ingredients:
1 egg
4 tablespoons granulated sugar
4 tablespoons self-rising flour
3 tablespoons unsweetened cocoa powder
3 tablespoons peanut butter
3 tablespoons milk
2 large marshmallows

Directions:
Add all the ingredients except for the 2 marshmallows into a large mug. Make sure you use a large mug. I learned this the hard way when making my chocolate-hazelnut mug cake. With a fork, whisk the ingredients until well combined. On high, microwave the cake for 1.5 minutes. Add the 2 marshmallows on top and microwave the cake for another minute. The marshmallows will expand. Keep in mind that baking times will vary with each microwave.

Enjoy!

~Krissy

Mug Cake Sample Platter
Also Check Out:
Chocolate Chip Cookie in a Mug
Chocolate-Hazelnut Mug Cake
Chocolate Peanut Butter Mug Cake
Gluten-Free Mug Cake
Chocolate Chip Cookie Dough Mug Cake
Pumpkin Mug Cake with Cream Cheese Frosting 

Wednesday, September 19, 2012

Chocolate Chip Cookie Dough Mug Cake

I almost didn't make this mug cake because I already have a recipe for an actual chocolate chip cookie made in a mug that's pretty damn good. Plus, the recipe didn't call for self-rising flour, baking soda, or baking powder. I was skeptical of how it would come out. However, I'm a sucker for chocolate chip cookies so I went ahead and made it anyway. And I'm glad I did. It turned out spectacular.

The recipe comes from here.

Ingredients:
1 egg
3 tablespoons brown sugar, packed
1/3 cup all-purpose flour
1 tablespoon butter, softened
a handful of semi-sweet chocolate chips

Directions:
Add all the ingredients to a coffee mug and mix them together with a fork until they are well combined. Microwave for 1.5 to 2 minutes on high powder. Keep in mind that all microwaves cook at different temperatures. Mine took the full 2 minutes to bake.


Enjoy!

~Krissy

Mug Cake Sample Platter
Also Check Out:
Chocolate Chip Cookie in a Mug
Chocolate-Hazelnut Mug Cake
Chocolate Peanut Butter Mug Cake
Gluten-Free Mug Cake
Fluffernutter Mug Cake
Pumpkin Mug Cake with Cream Cheese Frosting

3-Ingredient Gluten-Free Chocolate Mug Cake

Most mug cakes come out surprising moist. However, this mug cake takes the cake, so to speak, when it comes to moistness. It's down right gooey--in a good way. With only three ingredients, its incredibly easy to make. But what makes this cake even more special, it's gluten-free.

This recipe comes from here.

Ingredients:
1 egg
4 tablespoons powdered sugar
2 tablespoons unsweetened cocoa powder

Directions:
With a fork, whisk all the ingredients together until well combined. Microwave for 50 to 60 seconds on high. Keep in mind that all microwaves cook differently. My cake needed the full 60 seconds.

While I ate this cake plain, I could definitely see a scoop of vanilla ice cream complimenting it.

Enjoy!

~Krissy & Eric

Mug Cake Sample Platter
Also Check Out:
Chocolate Chip Cookie in a Mug
Chocolate-Hazelnut Mug Cake
Chocolate Peanut Butter Mug Cake
Fluffernutter Mug Cake
Chocolate Chip Cookie Dough Mug Cake
Pumpkin Mug Cake with Cream Cheese Frosting

Tuesday, September 18, 2012

Chocolate Peanut Butter Mug Cake

Reese Peanut Butter Cups, Peanut Butter M&Ms, Butterfingers . . . Chocolate and peanut butter are one of those combinations that was surely created in heaven. So you know I had to make a chocolate peanut butter mug cake. Out of all the mug cakes I have made, I think this one is the least sweet, and I think that's what I like best about it.

This recipe comes from here.

Ingredients:
1 egg
1 tablespoon brown sugar, packed
2 tablespoons peanut butter
1 tablespoon flour
1 tablespoon unsweetened cocoa powder
1/4 teaspoon baking powder
a handful of chocolate chips

Directions:
With a fork, mix all the ingredients together in a coffee mug.  Microwave for 1 to 2 minutes. Keep in mind that all microwaves cook differently. My cake took 1.5 minutes.

I enjoyed this cake as is. But I also think this is one of the few mug cakes you could add frosting or whipped cream to without making it treacly.


Enjoy!

~Krissy

Mug Cake Sample Platter
Also Check Out:
Chocolate Chip Cookie in a Mug
Chocolate-Hazelnut Mug Cake
Fluffernutter Mug Cake
Gluten-Free Mug Cake
Chocolate Chip Cookie Dough Mug Cake
Pumpkin Mug Cake with Cream Cheese Frosting

Monday, September 17, 2012

Chocolate-Hazelnut Mug Cake

A large part of the reason I tested out so few recipes last month was because I was working away on my next novel (if you're curious, you can see my work here). In fact, I've already finished a rough draft. However, all that non-stop typing has aggravated my carpel tunnel something fierce. In order to give my poor hands and wrists a break and get away from the computer, I decided to spend a day in the kitchen. Not that baking is necessarily great for the hands and wrists either, but it's better than typing and surfing the net. For whatever reason, I decided I wanted to make mug cakes. So for the next week, I'm going to share a mug cake recipe with you each day.

S.L.U.T.S: Southern Ladies Under Tremendous Stress.
What is a mug cake? It is a single serving-size cake made in a coffee mug and baked inside your microwave. Yes, you can really bake a cake inside your microwave in three minutes or less. (You can also make a chocolate chip cookie, potato chips, and zucchini chips in your microwave). They are perfect for kids, college students (I would have killed to know about these tasty desserts when I was in college), and a late night sweet tooth.

I will begin the week with a chocolate-hazelnut cake from here. Normally, I like to use my own homemade chocolate-hazelnut spread, but I had smeared the last of it on my morning banana. Thankfully, while out running errands with Eric, we discovered that Jif now makes a chocolate-hazelnut spread. It's delicious and cheaper than Nutella. (I still like mine the best though).


Ingredients:
1 egg
4 tablespoons self-rising flour
4 tablespoons granulated sugar
3 tablespoons unsweetened cocoa powder
3 tablespoons chocolate-hazelnut spread.
3 tablespoons milk
3 tablespoons vegetable oil

Directions: 
Mix all the ingredients together in a large coffee mug. It is very important that you use a large coffee mug. I didn't and this was the result:

At least it still tastes delicious.

With a fork, whisk the ingredients until they are well combined and the batter is smooth. With the microwave set on high, cook for 1.5 to 3 minutes. Keep in mind that all microwaves cook differently. Mine cooked in 2 minutes.

Allow the cake to cool. Eat in the mug or pour the cake out on a plate. While I think the cake is plenty sweet enough on its own, you could add frosting, cool whip, or even ice cream to the cake.

Enjoy!

~Krissy

Mug Cake Sample Platter
Also Check Out:
Chocolate Chip Cookie in a Mug
Fluffernutter Mug Cake
Chocolate Peanut Butter Mug Cake
Gluten-Free Mug Cake
Chocolate Chip Cookie Dough Mug Cake
Pumpkin Mug Cake with Cream Cheese Frosting

Sunday, September 16, 2012

Homemade Hot Chocolate Mixes

Oh, Hot Chocolate
How do I love thee? 
Let me count the ways . . .
I don't drink coffee or tea, and let's face it, I'm a chocoholic. And I'm cold all the time. I'm the only person I know that wears a sweater in eighty degree weather (and I carry a sweater with me when its ninety). So hot chocolate not only satisfies my chocolate cravings but warms me from the inside out. I usually buy Swiss Miss in bulk. When I want to treat myself, I spurge on Land O Lakes hot chocolate mix. With fall nearly upon us and the weather once again cooling, I figured it was time that I make my own hot chocolate mix. I found this great recipe and just tweaked it a little to make a delicious hot chocolate and a deep, rich dark chocolate hot cocoa recipe. 

Since I love my hot cocoa so much, I wanted to make sure to use quality ingredients, starting with the cocoa powder. You can use natural or Dutch-process cocoa powder. Natural cocoa powder comes from cocoa beans that have been roasted then pulverized into a fine powder. The cocoa beans of Dutch-process cocoa powder have been treated with a solution that neutralizes their acidity. This treatment makes the powder darker and gives the cocoa powder a smoother, less bitter taste. I prefer a blend of natural and Dutch process (I use SACO), but I also like natural cocoa powder too. However, keep in mind that if you're baking with cocoa powder, natural and Dutch-process cannot always be substitute for each other. Click here for more information on baking with cocoa powder.

I also recommend using quality chocolate.

Regular Hot Chocolate Mix
Makes approximately 20 servings

Ingredients:
3 cups nonfat dry milk powder
2 cups powdered sugar
1 1/2 cups unsweetened cocoa powder
1 1/2 cups white chocolate chips
1/4 teaspoon salt

Directions:
In a large bowl, mix all the ingredients together. Pour about half of the mix into a good processor and pulse until the chocolate chips become finely ground. Pour into an airtight container. Repeat with the other half of the mix.

To make a cup of hot chocolate: heat up 1 cup milk, pour in 1/3 cup hot cocoa mix, and stir.

Top with whipped cream and marshmallows if desired. (See Homemade Marshmallows)


Dark Chocolate Hot Cocoa Mix
Makes approximately 20 servings

Ingredients:
3 cups nonfat dry milk powder
2 cups powdered sugar
1 1/2 cups unsweetened cocoa powder
1 1/2 cups dark chocolate chips
1/4 teaspoon salt
pinch of cayenne pepper

Directions:
In a large bowl, mix all the ingredients together. Pour about half of the mix into a good processor and pulse until the chocolate chips become finely ground. Pour into an airtight container. Repeat with the other half of the mix.

To make a cup of hot chocolate: heat up 1 cup milk, pour in 1/3 cup hot cocoa mix, and stir.

Top with whipped cream and marshmallows if desired.

*The cayenne pepper doesn't make the hot cocoa spicy but emphasizes the chocolate flavor.


I plan on doing a lot of experimenting with this hot chocolate mix. When I use a store-bought I was always adding different spices. Cayenne pepper, cinnamon, pumpkin pie spice . . . or a shot of Baileys, Kahlua, or this amazing chocolate-raspberry rum I bought in the Virgin Islands years ago. (I might just have to return to buy some more!) Eric's not a big hot chocolate person, but I might have to crush some peppermint candies up in the mix for Christmas and have him try it. And I might just add some ground hazelnuts to the mix at some point too. Maybe I'll switch out the chocolate chips for peanut butter chips or cinnamon chips. The possibilities are endless.

Enjoy!

~Krissy

Saturday, September 15, 2012

Pesto Lasagna Rolls

I've had this recipe in my collection for a few years and I can't believe I haven't shared it yet. I love your typical lasagna . . . the cheeses, the pasta, the tomato sauce. But sometimes it's nice to change things up. I do that with pesto.

Pesto Lasagna Rolls with Meat Sauce
A small batch with just tomato sauce.
Ingredients:
1 cup part-skim ricotta cheese
2 tablespoons Parmesan cheese
2/3 cup pesto sauce*
8 lasagna noodles, cooked
1 cup tomato sauce**
1 cup shredded mozzarella, divided
salt, to taste
pepper, to taste

Directions:
Preheat oven to 400 degrees. Spoon a small amount of tomato sauce on the bottom of shallow casserole dish.

In a medium bowl, mix ricotta, Parmesan, 1/4 cup mozzarella, and pesto sauce together. Season with salt and pepper.

 
Evenly divide the cheese mixture between the 8 noodles, spreading the mixture over the entire noodle.


Roll the noodles and place the lasagna rolls seam-side down in the casserole dish.


 Pour tomato sauce over the top of the rolls. Sprinkle the remaining mozzarella cheese over top.

Bake for 25 to 30 minutes.

Pesto Sauce
*I prepare my pesto sauce using Knorr's powdered pesto mix. One day I hope to make my own basil pesto sauce. If you make pesto sauce, make sure it's cold before you add it to the cheese mixture or else you will melt the cheese. You can also use jarred pesto sauce.

**Prego Roasted Red Pepper is my all time favorite tomato sauce. If you read this blog, you probably already know that. But you can use any tomato sauce or meat sauce that you like.

You could also use this recipe to make pesto stuffed shells.

 Enjoy!

~Krissy

Wednesday, September 12, 2012

Chocolate Syrup

Chocolate syrup is pretty much a staple in our house. However, I will never buy chocolate syrup from the store again. Why you may ask.  For the simple fact that I can now make it myself. This chocolate syrup recipe is not only super easy to make and significantly cheaper than buying chocolate syrup, but it also tastes so much better--and more chocolaty.  Plus, it doesn't contain all those "extra ingredients" like high fructose corn syrup.

This recipes is slightly adapted from here.


Ingredients:
1 1/4 cup white sugar
1 cup unsweetened cocoa powder
1 cup water
1/4 teaspoon salt
2 teaspoon vanilla extract

Directions:
Pour the sugar in a medium saucepan. Sift the cocoa powder into the saucepan (this gets out the lumps) then whisk the sugar and cocoa powder together. Pour in water and add salt. Over medium heat, bring the mixture to a boil, stirring frequently. Allow to boil for a couple of minutes or until syrup thickens, stirring constantly. Remove the pan from heat and allow to cool for about 5 minutes. Stir in vanilla extract. Pour in an air-tight container--I used an old chocolate syrup bottle.

I haven't tried the syrup on ice cream yet, but it makes the best chocolate milk!

Enjoy!

~Krissy

Tuesday, September 11, 2012

Banana Chips

I eat a banana with breakfast almost every single day. That's how much I like bananas. So I couldn't wait to make these banana chips. While simple and delicious, they are more chewy than crisp. But that doesn't bother me one bit. They're still yummy to snack on, almost like candy. Eric absolutely loved them. 

Meet Wilson. He loves bananas even more than me.
Ingredients:
Ripe bananas (the riper the bananas, the sweeter the chips)
Cooking Spray

Directions:
Preheat oven to 200 degrees. Line a cookie sheet with wax paper and spray with cooking spray.

Slice the bananas as thin as you can. The thinner they are, the crisper and less chewy they will be. Place the banana slices in a single layer on a cookie sheet.

Try to ignore the chocolate Jif in the background. It doesn't have anything to do with this recipe.
Bake for 1 hour. Flip the chips over and bake for another hour. Remove the chips from the oven and allow them to cool. The longer the cool, the harder they will become. Store in an air-tight container.

Enjoy!

~Krissy & Wilson

Also Check Out:
Zucchini Chips 2.0
Baked Apple Chips
Potato Chips in the Microwave 
Snowflake Tortilla Chips
Homemade Pita Chips

Sunday, September 9, 2012

Zucchini Chips 2.0

You might remember that I already shared a zucchini chip recipe with you last winter. This is version 2.0.

I love zucchini chips. I probably eat them for lunch a couple times a week. But cooking them in the oven is a long process and the chips always seem to cook at different paces, so if I don't constantly check the oven, some burn. After making potato chips in the microwave, I wondered if I could make zucchini chips in the microwave too. Guess what? It worked. It worked a thousand times better than the oven. It was faster, easier, and the chips came out even crispier!

Ingredients:
Zucchini
Cooking spray
Seasonings

Directions:
Slice the zucchini into thin slices using a mandolin. Place a sheet of wax paper on a microwave-safe plate and spray it generously with cooking spray. Place the zucchini slices on the plate in a single layer. Season to taste. I like my zucchini chips with garlic powder and onion salt. However, you can use grated parmesan cheese, just salt and pepper . . . anything that sounds good to you.

On high power, microwave for 4 to 6 minutes. Allow the chips to rest for 1 minute. Microwave for another 2 to 3 minutes or until light brown spots appear on the chips. Keep in mind each microwave cooks differently. Mine turn out best when cooked for 4 minutes then 2.5 minutes.

Enjoy!

~Krissy

More Chip Recipes:
Baked Apple Chips
Banana Chips
Homemade Pita Chips
Kale Chips
Potato Chips in the Microwave
Snowflake Tortilla Chips 

Saturday, September 8, 2012

Potato Chips in the Microwave!

So I kind of dropped the ball last month with my cooking. Only four recipes for all of August and one of them belonged to Eric's mom. I plan to make up for it this month, starting with three days of chips! Potato chips, a new version of zucchini chips, and banana chips.

I've seen lots of recipes for potato chips made in the microwave, but I've been skeptical. How is a microwave going to make potatoes crisp? And I'm not a huge potato chip person to begin with; I'd rather snack on crackers. But curiosity got the best of me. And it actually works! You can make delicious, healthy, crisp potato chips in your microwave in about ten minutes!

These potato chips actually taste like potato and not grease.
Ingredients:
Russet potatoes, scrubbed and dried
Cooking spray
seasonings

Directions:
If you want, you can skin your potatoes, but I don't.

Slice the potatoes into paper thin slices. The easiest way to do this is with a mandolin (the food cutter, not the instrument). If you don't have one, the culinary utensil is well worth the $20 investment.

Place wax paper on a microwave-safe plate. Spray the paper with cooking spray and arrange the potato slices in a single layer on the plate. Season with salt, garlic powder, cayenne pepper . . . whatever your heart desires.


On high-power, microwave the chips for 4 to 6 minutes. Let the potatoes rest for 1 minute. I don't know why this rest period makes a difference, but it does. Then cook your potatoes for another 4 to 6 minutes or until brown spots begin to appear on the chips. Every microwave cooks differently so you're going to have to keep an eye on the potato chips the first time you cook them so they don't burn. In my microwave, 5 minutes then 4 minutes works perfectly.

Store in an air-tight container.

Eric loves salt and vinegar chips. You can also makes these in the microwave. Just dip the potato slices in balsamic vinegar, arrange on the plate, season with salt (I use kosher salt), and cook.

Salt and Vinegar Chips

Enjoy!

~Krissy

More Chip Recipes:
Baked Apple Chips
Banana Chips
Homemade Pita Chips
Kale Chips
Snowflake Tortilla Chips 
Zucchini Chips 2.0