Showing posts with label chocolate. Show all posts

Monday, December 22, 2014

Molasses Chews

Normally I have a huge Christmas baking list that I have to whittle down to something manageable. This year, I'm feeling a little burnt out, I think. This is the only new recipe I tried this year (and it's a keeper!). I mostly made cookies and candies I've done before, and not that many (see my Christmas baking list at bottom of post). I have to admit, it was kind of nice enjoying my favorite treats again.

Recipe from here.


Ingredients:
3 tablespoons butter
1 cup semi-sweet chocolate chips
1 cup whole milk
1 cup unsulphured molasses
1 cup granulated sugar
1 teaspoon vanilla extract

Candy thermometer

Directions:
Line an 8x8-inch glass baking dish with wax paper and lightly grease with cooking spray.

In a heavy bottomed saucepan, combine butter, chocolate, milk, molasses, and sugar over medium-high heat, stirring frequently. Insert candy thermometer in the pan.

When the temperature reaches 248 on the thermometer, remove pan from heat and stir in vanilla.

Carefully pour the molasses caramels into the prepared pan. Allow to cool and set for at least two hours. Remove the molasses chews from the dish and cut into bite-size squares. If you find the caramel sticking to the knife, spray the knife with cooking spray. Wrap the individual chews in wax paper.


Enjoy!

~Krissy

Christmas Baking List 2014:
Kiss Cookies
Soft and Chewy Gingerbread Men Cookies 
Spiced Rum Brown Butter Cookies
Homemade Marshmallows
Pumpkin Caramels!
Gingerbread Hot Chocolate


Wednesday, April 9, 2014

Cadbury Egg Bark (with homemade Cadbury Egg Recipe)


Eric licked his plate. That was how much he loved this Cadbury Egg Bark.

Easter candy is my all time favorite candy. Jelly beans, robin eggs, Cadbury eggs . . . I could eat my weight in the sugary goodness. So of course I bought us some Cadbury eggs, and I was kind of shocked by how expensive they had gotten. However, that only inspired me to make my own--which is surprisingly and remarkably easy! But I was too lazy to make them into eggs so I made them into bark. But this recipe will work to make eggs (see links at bottom of post).

Recipe adapted from here.


Ingredients:
1/2 cup light corn syrup
1/4 cup butter, room temperature
3 cups powdered sugar
1 teaspoon vanilla extract
1/4 teaspoon salt
Yellow food coloring
12 ounces Cadbury milk chocolate (you can use other chocolate--I used Nestle, but I wished I would
     have used Cadbury), divided

Directions:
Line a cookie sheet with waxed paper.

Place 6 ounces of the chocolate into a microwave-safe bowl. Microwave for 30 seconds, stir, and repeat until chocolate is melted and smooth. Pour the melted chocolate on the waxed paper. Using a rubber spatula, spread the chocolate out to an 8x8 square (approximately--mine turned out more rectangle than square). Refrigerator for about 1 hour or until chocolate is hard.

While chocolate hardens, make creme. With an electric mixer, cream the corn syrup, butter, and vanilla together in a medium bowl. Sift the powdered sugar and beat until well combined.

Place half of the creme in a second bowl. Add yellow food coloring (I used 5 drops) and combine.


Spread white creme over the hardened chocolate using a rubber spatula. Spread yellow creme over white creme using a rubber spatula. Refrigerate for about 30 minutes.


Place the remaining 6 ounces of the chocolate into a microwave-safe bowl. Microwave for 30 seconds, stir, and repeat until chocolate is melted and smooth. Spread melted chocolate over the creme. Refrigerate for 1 hour.

With a knife, cut bark into squares. Store in an airtight container in the fridge.


This link uses the same recipe to make Cadbury eggs using a mold.
This link uses the same recipe and doesn't require a mold.

Enjoy!

~Krissy

More Easter Recipes:
How to Dye Easter Eggs with Kool Aid
Cupcakes Baked Inside An Easter Egg
Chocolate Bunnies Made with Edible Clay

Monday, December 16, 2013

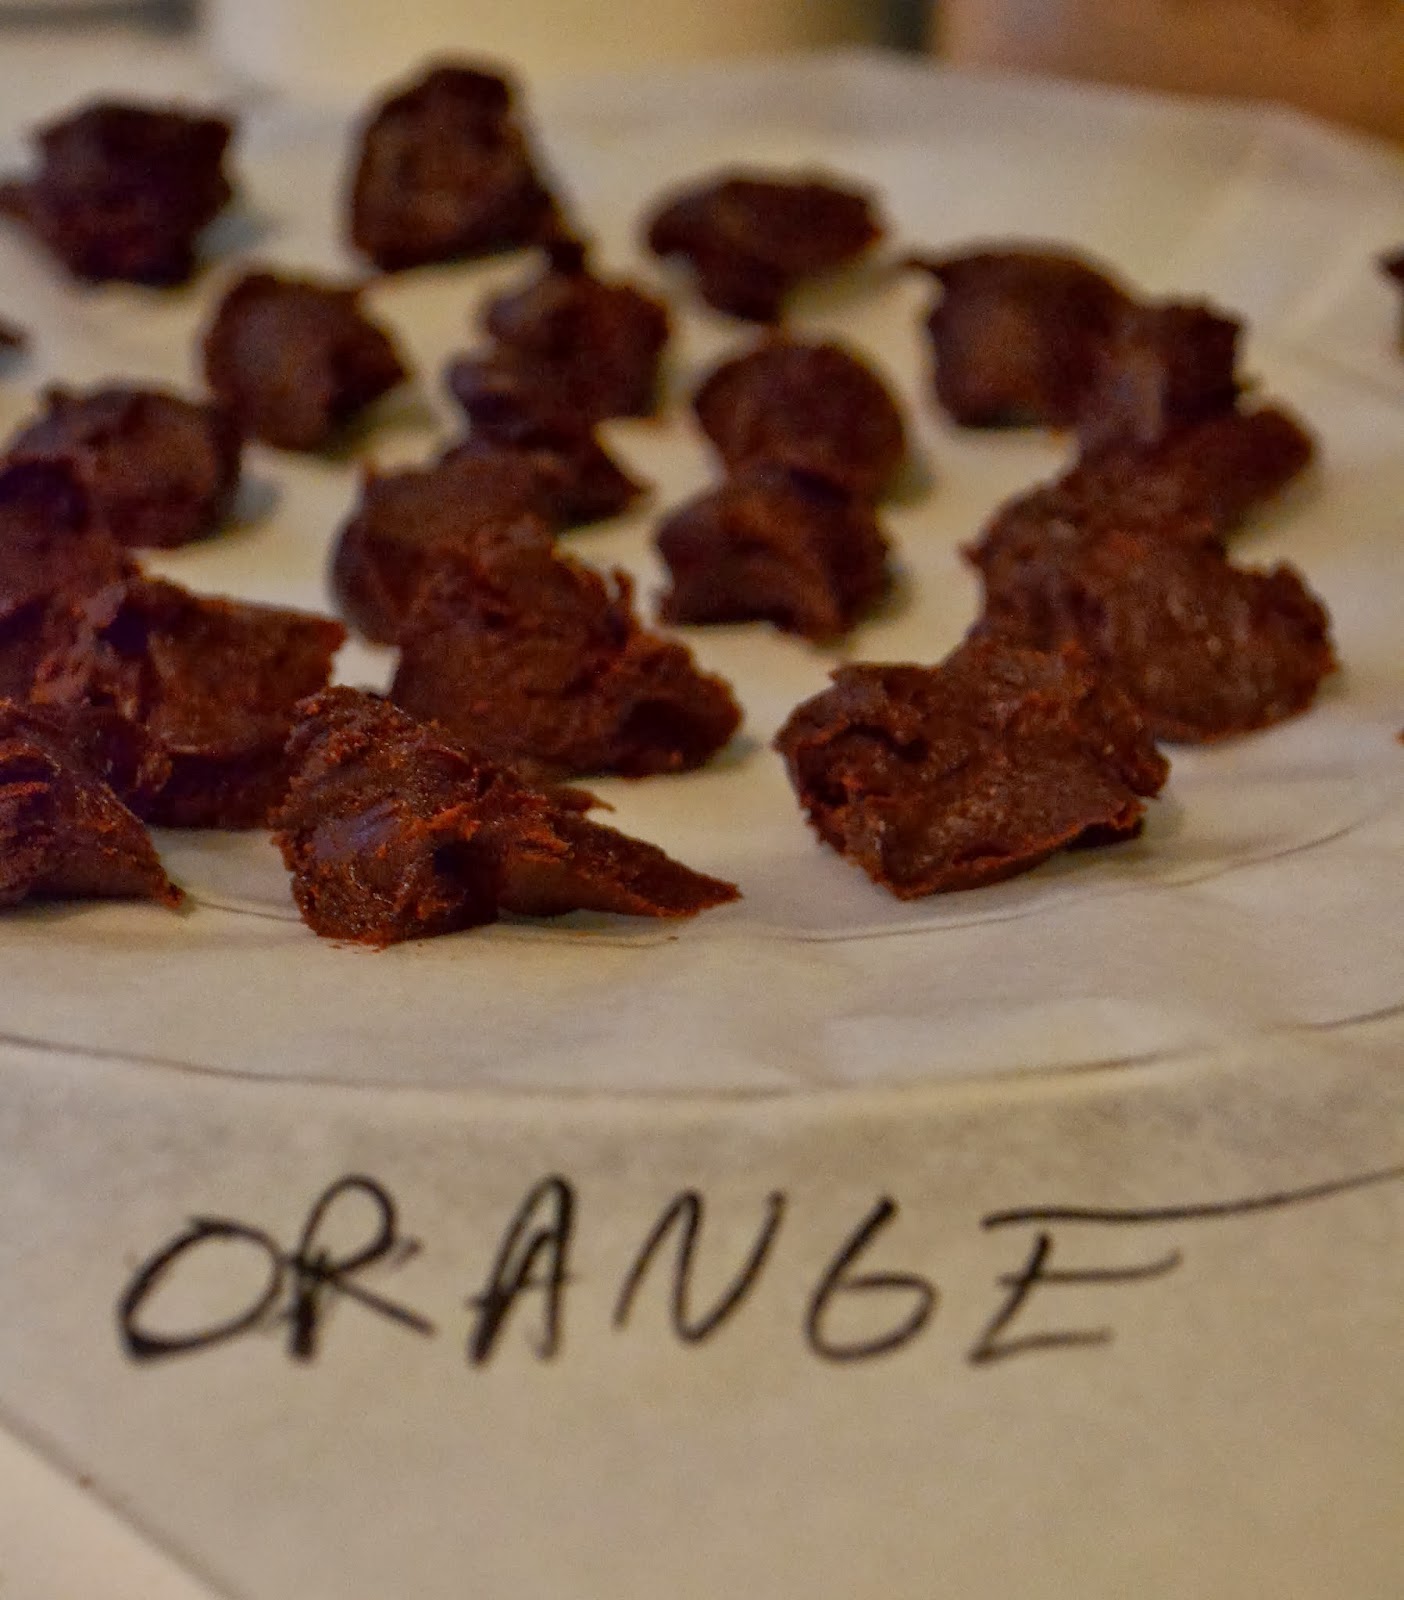
Three Chocolate Truffles: Mint, Rum, and Orange


Okay, so chocolate truffles have made an appearance on this blog before. I made mint chocolate truffles a couple of Christmases ago. And this is pretty much the same recipe except I changed a few flavors. But I am in love with chocolate truffles. I have made them many times and will make them many times again. The mint ones are for Eric because those are his favorite. Of course, mint everything is Eric's favorite. I few weeks ago I made him peppermint ice cream and he ate it all before I could snap a picture and post it here.

Usually orange chocolate is my favorite. Ironically, my mom used to give me one of those chocolate oranges in my stocking every year, and I hated them. I could never understand why she kept me one (probaby because I ate it anyway because it was, hey it's chocolate). Now I'm totally in love with the orange-chocolate combination. But these rum ones stole first place in my heart. Dark rum and chocolate, a match made in heaven.


Mint Chocolate Truffles
Ingredients:
12 ounce bag of semi-sweet chocolate chips
1 cup whipping cream
2 teaspoons mint extract
colored sugar, powdered sugar, cocoa powder, nuts, etc. for rolling

Directions:
In a saucepan, bring the whipping cream to a boil. Put chocolate chips in a large mixing bowl. Pour the cream over the chocolate and let sit for 3 minutes. Add mint extract and whisk the mixture until it's smooth. Refrigerate, uncovered, until the chocolate thickens, about 2 hours.

Line a cookie sheet with wax paper and spoon teaspoon-sized mounts of chocolate onto the wax paper. Don't worry about shaping into balls yet--the chocolate still needs to harden more before its workable. Refrigerate again for about 45 minutes.

Roll chocolate mounts into balls then roll the balls in sugar (or cocoa powder or nuts, your choice) and place them back onto the cookie sheet. To keep the chocolate from melting, only work with 2 or 3 mounts at a time while the rest remain in the refrigerator. Refrigerator the truffles for another hour then store in an air-tight container in the fridge. Yields between 50 and 60 truffles.

Rum Chocolate Truffles
Ingredients:
12 ounce bag of semi-sweet chocolate chips
1 cup whipping cream
1 tablespoon dark rum
colored sugar, powdered sugar, cocoa powder, nuts, etc. for rolling

Directions:
In a saucepan, bring the whipping cream to a boil. Put chocolate chips in a large mixing bowl. Pour the cream over the chocolate and let sit for 3 minutes. Add mint extract and whisk the mixture until it's smooth. Refrigerate, uncovered, until the chocolate thickens, about 2 hours.

Line a cookie sheet with wax paper and spoon teaspoon-sized mounts of chocolate onto the wax paper. Don't worry about shaping into balls yet--the chocolate still needs to harden more before its workable. Refrigerate again for about 45 minutes.

Roll chocolate mounts into balls then roll the balls in sugar (or cocoa powder or nuts, your choice) and place them back onto the cookie sheet. To keep the chocolate from melting, only work with 2 or 3 mounts at a time while the rest remain in the refrigerator. Refrigerator the truffles for another hour then store in an air-tight container in the fridge. Yields between 50 and 60 truffles.

Orange Chocolate Truffles
12 ounce bag of semi-sweet chocolate chips
1 cup whipping cream
2 teaspoons orange extract
colored sugar, powdered sugar, cocoa powder, nuts, etc. for rolling

Directions:
In a saucepan, bring the whipping cream to a boil. Put chocolate chips in a large mixing bowl. Pour the cream over the chocolate and let sit for 3 minutes. Add mint extract and whisk the mixture until it's smooth. Refrigerate, uncovered, until the chocolate thickens, about 2 hours.

Line a cookie sheet with wax paper and spoon teaspoon-sized mounts of chocolate onto the wax paper. Don't worry about shaping into balls yet--the chocolate still needs to harden more before its workable. Refrigerate again for about 45 minutes.

Roll chocolate mounts into balls then roll the balls in sugar (or cocoa powder or nuts, your choice) and place them back onto the cookie sheet. To keep the chocolate from melting, only work with 2 or 3 mounts at a time while the rest remain in the refrigerator. Refrigerator the truffles for another hour then store in an air-tight container in the fridge. Yields between 50 and 60 truffles.


Enjoy!

~Krissy

Christmas 2013 Baking List
Dark Chocolate Cover Cranberries
Michigan Cranberry Brownies
Honey Cake
Soft and Chewy Gingerbread Men Cookies 
Christmas Kiss Cookies 
Cherry Snowball Cookies 
The Best Sugar Cookies

Wednesday, December 4, 2013

Orange Slices Dipped in Chocolate

I had oranges in the fridge, I had chocolate chips in the pantry, and I thought why not. I usually pack Eric a lunch for work and they've been pretty boring lately. I thought at least the chocolate covered orange slices would be a nice change. Now, he doesn't like salted chocolate or caramel. I, however, do. So I salted half the orange and left the other half plain chocolate.


Ingredients:
1 small orange
1/4 cup chocolate chips (I used sem-sweet because that's what I had.)
Sea salt, if desired

Directions:
Peel the orange and carefully separate the slices. 

In a small microwave-safe bowl, melt the chocolate chips in the microwave. Microwave for 30 seconds, stir, and repeat as needed.

Dip half of each slice in the chocolate and place on a waxed paper lined plate or cookie sheet. Sprinkle with salt if desire. Refrigerator until the chocolate has hardened.

Eric said his little lunch surprise made him laugh--then he devoured them.


Enjoy!

~Krissy

More Fruit Recipes:
Yogurt-Covered Blueberries
Chocolate Covered Cranberries
White Chocolate Filled Raspberries
Chocolate Covered Cherries 
Candied Citrus Peels
Baked Apple Chips
Banana Chips

Thursday, August 8, 2013

Chocolate-Peanut Butter Banana Wontons

Chocolate, peanut butter, and bananas, I don't know why, but these three ingredients always taste so good together, comforting some how. I was originally just going to make chocolate banana wontons, but then I saw the peanut butter in the cupboard--how could I resist?


Ingredients:
16 wontons
1/4 cup chocolate chips*
8 teaspoons peanut butter
1 small ripe banana cut into 16 slices
powdered sugar, optional

*Like the smores wonton I made earlier, I made these with chocolate chips, but U had problems with the chips puncturing the wonton. I think bar chocolate like a Hershey candy bar will work better. I haven't made these with bar chocolate yet, but I'm guessing you could just break the bars in half and that would be plenty of chocolate for the wonton. (Hershey bars come with 12 bars so you'd need 8 bars broken in half).

Directions:
Preheat oven to 375 degrees.** Line a cookie sheet with parchment paper or grease with cooking spray.

Place 1/2 teaspoon of peanut butter in the center of the wonton. Add 1 banana slice on top of the peanut butter. Place 6 to 8 chocolate chips around the banana. 

Wet all four edges of the wontons with water (I used my finger, but you could also use a pastry brush) and fold over diagonally, pressing the edges together to seal.

Bake for 6 to 8 minutes or until the wontons turn a golden brown.

Sprinkle with powdered sugar. (This was Eric's idea and it did improve them.)

**You can also deep fry these if you so desire.

Enjoy!

~Krissy

More Wonton Recipes
Homemade Pizza Rolls
Cream Cheese Rangoons
Chocolate Hazelnut Ravioli
Smores Wontons
Jalapeno Popper Wontons

Thursday, July 4, 2013

Smores Pie

Fireworks
Source

Nothing says summer like smores! So for Independence Day, Eric made us a smores pie. I can't even begin to tell you how amazing this dessert is. Seriously, no words would do this pie justice. And the aromas this dessert gives off--the chocolate baking, the marshmallow roasting--absolutely mouthwatering. And to make this recipe even more enticing: it's fairly simple to make. The hardest part is waiting for it to cool so you can take a bite! Eric is so proud of his creation--you should see the grin on his face!

Adapted from here.


Ingredients:
1 store-bought graham cracker pie crust
1 cup semi-sweet chocolate chips
1 cup heavy cream
1 egg, room temperature
pinch of salt
7-ounce (a little less than a cup) marshmallow fluff

Directions:
Preheat oven to 350 degrees.

Pour the chocolate chips in a large bowl. In a heavy saucepan bring heavy cream to a boil. Pour the cream over the chocolate chips and let it sit for 1 minute.

Whisk the chocolate and cream together until it's well combined and smooth. Add the egg and a pinch of salt to the mixture and whisk until well incorporated. Pour the chocolate mixture into the pie crust.

Cover the edges of the pie crust with foil and bake for 20 to 25 minutes or until the chocolate is almost set--the center should be a little bit jiggly.

Place the pie on a rack and allow to cool for about one hour.

Add the marshmallow fluff on top of the chocolate layer and smooth with a spatula. Set the oven to broil and place the pie back in the oven for just 2 or 3 minutes or until the top of the fluff turns a golden brown.

Allow pie to cool for about ten minutes before serving.

Bake chocolate layer

Marshmallow fluff layer

Under the broiler. It smells just like marshmallows roasting on a fire. Taste just like them too!


Oh so good.

Enjoy!

~Krissy

Check out these other Smores Recipes:
Smores Cookies
Smores Banana Boats
Peep Smores

Wednesday, December 19, 2012

Sea Salt Nutella Fudge


https://blogger.googleusercontent.com/img/b/R29vZ2xl/AVvXsEgC-b-0xeSEb_ePZBDOP6OZ_lfVxTxV0JRL3-Zvq-F2NiGd2JyOuvn0a_HT5o9o8OrwOtQZQNp5Bx-Ah3jHOknC-SnX0nxzS6VPZMp-iUCfyXA4ryYRUkeY1YAyM11egyN3xZfsDbqtpYvD/s1600/cmasw.bmp
Source

I've made homemade caramels, marshmallows, and even candy corn. But for some unknown reason I've been intimidated by fudge. I don't know why. It's not difficult to make. So I decided to tackle it this holiday season. I absolutely love hazelnut-chocolate spread and I love chocolate and salt, so when I found this recipe I knew it had to be my first fudge recipe. But I do have a confession. I didn't use Nutella. I used Jiffy's Hazelnut-chocolate spread. It's cheaper and just as yummy.

Recipe comes from here.


Ingredients:
1 14-ounce can sweetened condensed milk
1 teaspoon vanilla extract
1 cup bittersweet chocolate chips
1 cup hazelnut-chocolate spread
3 tablespoons unsalted butter, room temperature and cup into little blocks
sea salt

Directions:
Line the bottom and sides of an 8x8 pan with parchment paper and spray with cooking spray (you can also grease it with butter).

Combine the sweetened condensed milk, vanilla, chocolate chips, hazelnut-chocolate spread, and butter in a medium glass (heat proof) bowl.

Create a double-boiler by setting the bowl over a medium-size saucepan of simmering water. The bottom of the bowl shouldn't touch the water. Stir in chocolate chips. Mix until the chips are melted and the mixture is smooth.

Double boiler


Pour the fudge into the prepared dish and smooth the top with a spatula. Sprinkle with sea salt. Refrigerate for 2 to 5 hours or until the fudge is firm.

Sprinkle with salt
To cut the fudge, remove the parchment paper from the dish. Run a knife under hot water, dry it off, and use it to cut the fudge into squares. Store in an airtight container in the refrigerator. 

Enjoy!

~Krissy

2012 Christmas Baking List
Christmas Kiss Cookies
Tea Cookies
Cornflake Wreath Cookies
Candied Citrus Peels
Christmas Candy Corn
Homemade Chocolate-Covered Cherries
Peanut Butter Fudge
Spiced Cranberry Juice

Check out last year's baking list!

Saturday, December 15, 2012

Chocolate Covered Cherries

I love chocolate covered cherries. In high school my mom used to always put a box in my stocking. In college, I treated myself to a box every Christmas season when they began popping up in the grocery store in abundance. This year I decided to make my own. Chuck, my future father-in-law, considers himself a connoisseur of chocolate covered cherries. He loves them and has tried a lot of different kinds. He absolutely loved these. He even told me I should be proud of myself, they were that good. Eric was madly in love with them too.

With that said, these chocolate covered cherries were supposed to have liquid centers. However, the centers stayed cream, a very tasty cream, but still a cream. So if you're looking for a recipe for chocolate covered cherries with liquid inside, this recipe isn't for you.

Fair warning, these need to age for about a month to get the best flavor so you have to start early, like in November.

Ingredients:
2 5-ounce jars of maraschino cherries (roughly 60)
1/3 cup butter, softened
1/3 cup corn syrup
1/2 teaspoon salt
2 teaspoon cherry liquid from the jar of cherries (you can also use vanilla extract, almond extract, or brandy)
3 3/4 cups powdered sugar, sifted
2 cups chocolate chips*

Directions:
Drain the cherries in a strainer and dry the cherries using paper towel. You want to get the cherries as dry as you can, but be careful not to crush them. Reserve 2 teaspoons of cherry liquid.


In a large bowl, combine butter and corn syrup. You can use an electric mixer or do it by hand. I did it by hand with ease. Stir in cherry liquid and salt. A cup at a time, add the sugar to the mixture until it is well incorporated. After about 2 1/2 cups and began kneading the sugar into the fondant.

Take about 1/2 tablespoon of fondant, wrap it around a cherry, and place on a wax-lined cookie sheet. Repeat with the remaining cherries. Freeze for 1 hour.

Melt chocolate in a double boiler or in the microwave. Since chocolate is easy to burn, only microwave the chocolate for 30 seconds at a time, stirring between intervals, until it is melted and smooth. Coat the cherries in chocolate and place them back on the waxed cookie sheet.

Place the chocolate covered cherries into the freeze for 30 minutes then transfer them to an air-tight container and store for 7 to 30 days in the refrigerator. 

*The original recipe calls for 2 cups chocolate chips. I probably used double that. I always end up using a ton of chocolate when coating stuff.

Enjoy!

~Krissy

2012 Christmas Baking List
Christmas Kiss Cookies
Tea Cookies
Cornflake Wreath Cookies
Candied Citrus Peels
Christmas Candy Corn: Peppermint and Cinnamon
Sea Salt Nutella Fudge
Peanut Butter Fudge
Spiced Cranberry Juice

Check out last year's baking list!

Wednesday, December 12, 2012

Chocolate on Chocolate Cake

Happy Birthday Chuck!

Today is my future father-in-law's birthday. Since my future mother-in-law recently underwent surgery, I made the birthday dinner (lime mustard chicken and mashed potatoes) and cake. He loves a chocolate on chocolate cake (chocolate cake with chocolate frosting) so that's exactly what I made. I think this is my first cake from scratch, believe it or not. I chose it because of it's simplicity. It's incredibly moist and light in texture and rich in taste. Everyone enjoyed it. But I can't help but wonder if I could intensify the chocolate flavor by using coffee or chocolate milk instead of water.

I topped the cake with one of favorite frostings--chocolate buttercream (see recipe below).

Original Recipe (with minor alterations)

Chocolate Cake
Ingredients:
2 cups all purpose flour, sifted
1 cup cocoa powder, sifted
2 teaspoons baking powder
2 cups hot water
2 cups sugar
2 eggs
2 tablespoon shortening, rounded
1 teaspoon salt

Directions:
Preheat oven to 350 degrees. Grease and flour two 9-inch round cake pans. Set aside.

Add all of the ingredients to a large bowl. Mix together until well combined.

Divide equally between the two pans. Bake for 35 minutes or until a toothpick inserted into the cake comes out clean.

Allow to cool then frost.


Chocolate Buttercream Frosting
Ingredients:
3 cups powdered sugar
2 sticks of unsalted butter, room temperature
1/2 teaspoon vanilla extract
1/2-1 cup cocoa powder, sifted (the amount depends how chocolaty you want your frosting)
4 to 6 tablespoon milk

Directions:
Place the the butter into a large bowl and cream with a hand mixer or standing mixer. Add vanilla and mix. Add 1 cup of sugar and blend on low speed until well incorporated. Then add another cup of sugar and beat until well blended. By now your buttercream is getting thick. Add 1 to 2 tablespoons milk and mix. Blend in the the final cup of sugar. Add a couple more tablespoon of milk if desired. Beat in the cocoa powder. To get light, smooth buttercream you need to blend the buttercream for 15 to 20 minutes on low.


Enjoy!

~Krissy

More Cake Recipes:
Apple Cider Cake
Chocolate Swirl Cake
Rice Crispy Cake
Starlight Mint Cake

Friday, September 21, 2012

Fluffernutter Mug Cake

Marshmallows make anything better, at least in my opinion. When Eric and I were up north at my parents' cabin last summer, we stopped by Dairy Queen for some ice cream. For the first time I saw marshmallow fluff as a sundae topping. Best sundae of my life. So I saved my favorite mug cake for last.

This recipes comes from here with some minor alterations. 

Ingredients:
1 egg
4 tablespoons granulated sugar
4 tablespoons self-rising flour
3 tablespoons unsweetened cocoa powder
3 tablespoons peanut butter
3 tablespoons milk
2 large marshmallows

Directions:
Add all the ingredients except for the 2 marshmallows into a large mug. Make sure you use a large mug. I learned this the hard way when making my chocolate-hazelnut mug cake. With a fork, whisk the ingredients until well combined. On high, microwave the cake for 1.5 minutes. Add the 2 marshmallows on top and microwave the cake for another minute. The marshmallows will expand. Keep in mind that baking times will vary with each microwave.

Enjoy!

~Krissy

Mug Cake Sample Platter
Also Check Out:
Chocolate Chip Cookie in a Mug
Chocolate-Hazelnut Mug Cake
Chocolate Peanut Butter Mug Cake
Gluten-Free Mug Cake
Chocolate Chip Cookie Dough Mug Cake
Pumpkin Mug Cake with Cream Cheese Frosting 

Wednesday, September 19, 2012

3-Ingredient Gluten-Free Chocolate Mug Cake

Most mug cakes come out surprising moist. However, this mug cake takes the cake, so to speak, when it comes to moistness. It's down right gooey--in a good way. With only three ingredients, its incredibly easy to make. But what makes this cake even more special, it's gluten-free.

This recipe comes from here.

Ingredients:
1 egg
4 tablespoons powdered sugar
2 tablespoons unsweetened cocoa powder

Directions:
With a fork, whisk all the ingredients together until well combined. Microwave for 50 to 60 seconds on high. Keep in mind that all microwaves cook differently. My cake needed the full 60 seconds.

While I ate this cake plain, I could definitely see a scoop of vanilla ice cream complimenting it.

Enjoy!

~Krissy & Eric

Mug Cake Sample Platter
Also Check Out:
Chocolate Chip Cookie in a Mug
Chocolate-Hazelnut Mug Cake
Chocolate Peanut Butter Mug Cake
Fluffernutter Mug Cake
Chocolate Chip Cookie Dough Mug Cake
Pumpkin Mug Cake with Cream Cheese Frosting