Sunday, December 18, 2011

Homemade Marshmallows

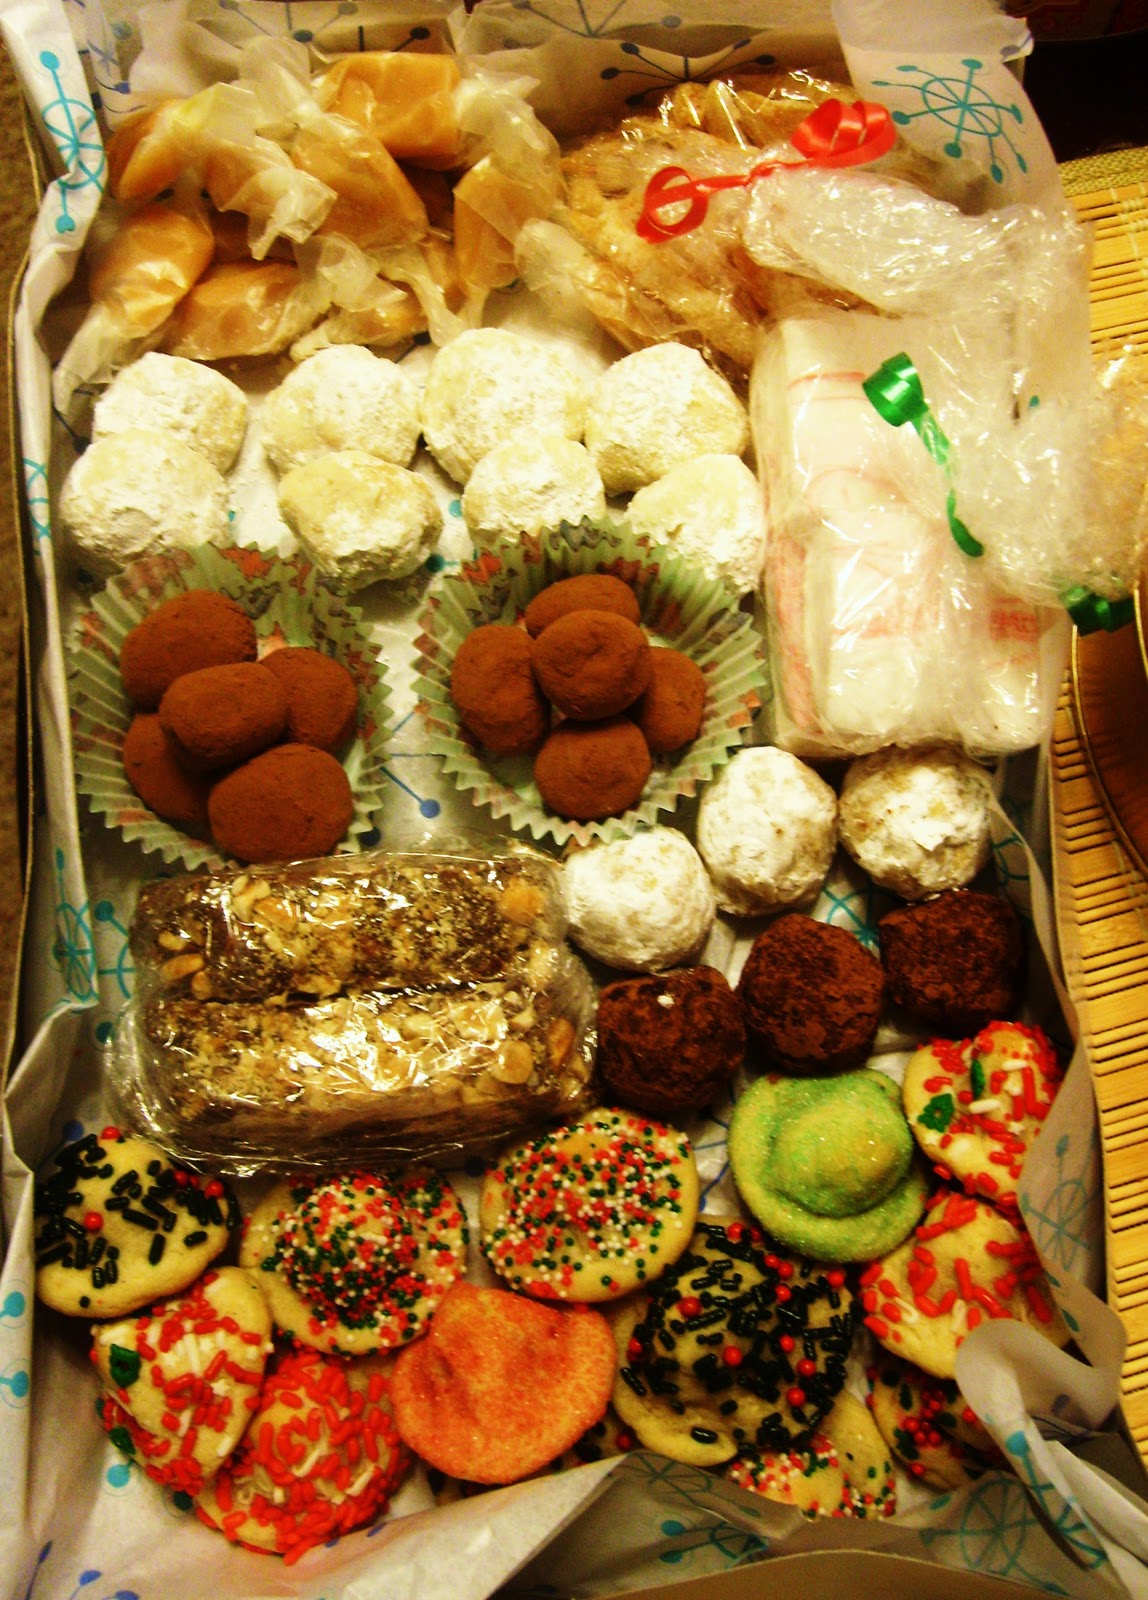
Big marshmallows, mini-marshmallows, marshmallow fluff, roasted marshmallows, marshmallows in hot chocolate, any which way, I love marshmallows. Eric likes to work his marshmallows with his hands and turn them into taffy before eating them (he is still such a little kid). So it was only a matter of time before I decided to make my very own marshmallows. And when I discovered that I already had all the ingredients in my pantry, I knew the time was now.

Twice I have broken hand mixers during my holiday baking. I almost did it again making these marshmallows. I strongly recommend using a standing mixer when making these.

Marshmallow Swirls

Ingredients:
3 packets of unflavored gelatin
1 1/2 cups granulated sugar
1 cup light corn syrup
1 cup water, divided
1/4 teaspoon salt
1 tablespoon vanilla extract
Confectioners' sugar, for dusting
red food coloring, optional

Special equipment: candy thermometer

Directions:
Butter a 9x13-inch baking dish and dust with confectioners' sugar. Set aside.

In a large bowl (or the bowl of a standing mixer), combine gelatin and 1/2 cold water and allow to soak.

In a saucepan, add sugar, corn syrup, salt, and 1/2 cup water and cook over medium-high heat. When the sugar dissolves, increase heat to high and cook the syrup until the temperature reaches 240 degrees on the candy thermometer. Remove the pan from the heat.

Attach the whisk attachment to your mixer. Slowly pour the syrup into the gelatin while whisking on low speed. Increase speed to high and whip the mixture until it becomes very thick, approximately 15 minutes.  Add in the vanilla extract and mix well.

Pour the marshmallow mixture into the pan and smooth the top. Since I was making these marshmallows for Christmas, I decided to give them a red swirl with food coloring. Drop a few drops of food coloring across the surface of marshmallows and swirl the food coloring using a toothpick. Dust with more confectioners' sugar. Leave out uncovered overnight so the marshmallows dry out.

Remove the marshmallow from the pan (I found it easiest to just lift the marshmallow from the pan versus turning the pan over) and cut them into squares. Dust them with confectioners' sugar one last time. Store in an airtight containers.


 Enjoy!

~Krissy

2011 Christmas Baking List:
Mint-Chocolate Truffles
Starlight Mint Cake
Sea Salt Caramels
Rocky Road Chocolate Log
Candied Citrus Peels
Easy Rum Balls
Homemade Marshmallows
Christmas Kiss Cookies
Tea Cookies

Other Holiday Cooking Ideas:
Snowflake Tortillas
Gingerbread House Decoration Ideas
Christmas Peep S'mores

Saturday, December 17, 2011

Christmas Kiss Cookies

These Hershey's Kiss cookies are a holiday tradition in my family. We've had them every Christmas for as long as I can remember and they always were--and still are--my all-time favorite Christmas cookies. My brother and I would unwrap all the Kisses, my mom would wrap them in the cookie dough then we would decorate them with colored sugar, sprinkles or frosting. These cookies are delicious with milk chocolate Kisses, heavenly with Hugs, and totally ambrosial with caramel Kisses. Hershey's makes so many different types of Kisses--almond, dark chocolate, candy cane, cherry, and many, many more--that it is easy to change this recipe up. But I like them best with good old milk chocolate Kisses.


Ingredients:
36 Kisses
1/2 cup shortening
1/2 cup granulated sugar
1/4 cup brown sugar--packed
1 teaspoon vanilla
1 egg
1 2/3 cups flour
1/2 teaspoon baking soda
1/4 teaspoon salt

Directions:
Preheat oven to 400 degrees.

On medium speed, cream the shortening, granulated sugar, and brown sugar until fluffy. Add vanilla and egg and mix well. In a separate bowl, mix flour, baking soda, and salt. Gradually add the dry ingredients to the shortening mixture, mixing on medium speed. Mix well but be careful not to over beat. Wrap approximately 2 tablespoons of dough around a Kiss. Dip the cookie in sugar or sprinkles. Bake on an ungreased cookie sheet for 6 to 7 minutes. Only the bottoms of the cookie will brown.  Cool on a wire rack. If you want to use the whole package of Kisses, double the recipe.
Kisses galore! No wonder I loved these as a kid.

Decorations
6 dozen cookies

Enjoy!

~Krissy


2011 Christmas Baking List:
Mint-Chocolate Truffles
Starlight Mint Cake
Sea Salt Caramels
Rocky Road Chocolate Log
Candied Citrus Peels
Easy Rum Balls
Homemade Marshmallows
Christmas Kiss Cookies
Tea Cookies

Other Holiday Cooking Ideas:
Snowflake Tortillas
Gingerbread House Decoration Ideas
Christmas Peep S'mores

Friday, December 16, 2011

Tea Cookies

These tea cookies are new to my baking list, but I think they are here to stay. I decided to give them a try because they kept popping up whenever I searched for new holiday recipes, they look like snowballs, and everyone seemed to love them. And now I know why. I don't usually go for crumbly, dry cookies--I generally like mine soft and chewy--but there is just something about these cookies that makes you want to eat the whole batch in one sitting.
Tea Cookies
Ingredients:
1 cup (2 sticks) unsalted butter, softened
1/2 cup powdered sugar, plus extra for rolling
1 teaspoon vanilla extract
2 1/4 cups flour
3/4 cup walnuts, finely chopped
1/4 teaspoon salt

Directions:
Preheat oven to 400 degrees.

Beat butter, powdered sugar, and vanilla  together until creamy. In a separate bowl mix the flour, walnuts, and salt. Gradually add the dry mixture to the creamy one until well blended. Shape into 1-inch balls and place the balls on an ungreased cookie sheet. Bake for 8 to10 minutes or until the cookies are firm but not brown. Allow the cookies to cool until they you can handle them. While still warm, roll the cookies in powdered sugar. Allow to completely cool, and roll in powdered sugar a second time. Recipe yields about 3 dozen.

Enjoy!

~Krissy

2011 Christmas Baking List:
Mint-Chocolate Truffles
Starlight Mint Cake
Sea Salt Caramels
Rocky Road Chocolate Log
Candied Citrus Peels
Easy Rum Balls
Homemade Marshmallows
Christmas Kiss Cookies
Tea Cookies

Other Holiday Cooking Ideas:
Snowflake Tortillas
Gingerbread House Decoration Ideas
Christmas Peep S'mores

Easy Rum Balls

I made these rum balls for the very first time last year and absolutely fell in love with them. So much so, that they've been added to my annual Christmas baking list. They are quick and easy, require no baking, and taste divine--if you like the taste of rum. The longer these cookies sit, the stronger the rum flavor becomes. This year I decided to make one batch with the dark rum as I usually do and another batch with coconut rum. Next year I can't wait to experiment with more flavors.
Rum Balls

Ingredients:
1 cup walnuts
2 cups Voortman vanilla wafers, coarsely chopped
2/3 cup powdered sugar, plus extra for rolling
3-4 tablespoons dark rum (or any other flavor of rum)
¼ teaspoon light corn syrup

Directions:
Place walnuts, wafers, and powdered sugar in your food processor. Pulse a few times until the ingredients are well mixed. Be careful not to turn the wafers or nuts into powder. Add 2 tablespoons of rum and corn syrup. Pulse 2 to 3 times. Add the last 1-2 tablespoons of rum.* Pulse until well mixed.

Lightly coat your work area and hands with powdered sugar. Roll dough into walnut-sized balls. Coat balls in powdered sugar and place on cookie sheet. Refrigerate for a half hour. Store your rum balls in an air tight container in the fridge. Recipes yields about 1 1/2 dozen.

You can also use chocolate wafers or coat your rum ball in unsweetened cocoa, melted chocolate, or chopped nuts.

*After 3 tablespoons of rum, your dough will still be crumbly but will stick together easily. 4 tablespoons makes the dough wet and the rum taste a lot stronger.
Rum Balls with dark rum.
Rum balls with coconut rum.

 Enjoy!

~Krissy

2011 Christmas Baking List:
Mint-Chocolate Truffles
Starlight Mint Cake
Sea Salt Caramels
Rocky Road Chocolate Log
Candied Citrus Peels
Easy Rum Balls
Homemade Marshmallows
Christmas Kiss Cookies
Tea Cookies

Other Holiday Cooking Ideas:
Snowflake Tortillas
Gingerbread House Decoration Ideas
Christmas Peep S'mores

Wednesday, December 14, 2011

Mint-Chocolate Truffles

Decadent and sophisticated, truffles make a great Christmas present for friends, co-workers, and family. Plus, they are relatively easy to make. I don't even know how many truffle recipes I looked through in trying to find the perfect recipe. Martha Stewart alone had at least eight. Nearly every chocolate manufacturer also had a truffle recipe. Not to mention countless blog recipes. From my research I learned:

1.) use quality chocolate (duh)
2.) the amount of whipping cream or butter you use determines the pliability of the chocolate
3.) there are endless flavor variations (and I wanted to try them all)
4.) all truffle recipes are pretty much the same

For my truffles I used whipping cream instead of butter or a cream-butter combination simply because I think that the whipping cream gives the chocolate a richer taste than the butter (However, I do use butter to make my Rocky Road Chocolate Log). Narrowing down what flavor I wanted to make was nearly impossible. Years ago I bought a bottle of chocolate-raspberry rum in the Virgins Islands. It was divine and I used to put it in cakes, fillings, frostings, hot chocolate . . . Man, did I wish I still had some of it left for the truffles. I debated using the brandy and Malibu rum we have in the house. I restrained myself from going out and buying Bailey's Irish Cream (next year for sure) or an orange liqueur. Finally, I decided on mint-chocolate truffles since I already had the mint extract and, as I've mentioned before, Eric loves everything mint.

Mint-chocolate truffles
Ingredients: 
12 ounce bag of semi-sweet chocolate chips
1 cup whipping cream
2 teaspoons mint extract
1/2 cup unsweetened cocoa powder

Directions:
In a saucepan, bring the whipping cream to a boil. Put chocolate chips in a large mixing bowl. Pour the cream over the chocolate and let sit for 3 minutes. Add mint extract and whisk the mixture until it's smooth. Refrigerate, uncovered, until the chocolate thickens, about 2 hours.

Line a cookie sheet with wax paper and spoon teaspoon-sized mounts of chocolate onto the wax paper. Don't worry about shaping into balls yet--the chocolate still needs to harden more before its workable. Refrigerate again for about 45 minutes.

Roll chocolate mounts into balls then roll the balls in cocoa powder and place them back onto the cookie sheet. To keep the chocolate from melting, only work with 2 or 3 mounts at a time while the rest remain in the refrigerator. Refrigerator the truffles for another hour then store in an air-tight container in the fridge. Yields between 50 and 60 truffles.

I absolutely loved how these truffles came out. They're almost too good to give away. I can't wait to experiment with different flavors and chocolates next year. Here are some ideas I came across during all my truffle research.

Truffle Flavor Ideas:
Chocolate
   dark chocolate
   white chocolate
   milk chocolate
   a combination of different chocolates
Any type of flavored liqueur under the sun*
   raspberry
   orange
   cherry
   strawberry
   apricot
   butterscotch
   caramel
   coffee
   coconut
Any type of extract under the sun
   vanilla
   mint
   hazelnut
   almond
   cinnamon
   rose water
   caradamom
   orange
   rum
Different Teas
   earl grey**
   green
   chai
   jasmine
Coating Ideas
   nuts: walnuts, pecan, hazelnuts, peanuts
   chocolate coating: dark, milk, white
   coconut flakes
   sprinkles
   colored sugar
   crushed candy: candy canes, toffee, mints

*most truffle recipes that I found call for 1-2 tablespoon of liqueur
**if you're interested in making tea truffles, Martha Stewart gives you a good jumping off point

Enjoy!

~Krissy

2011 Christmas Baking List:
Chocolate Truffles
Starlight Mint Cake
Sea Salt Caramels
Rocky Road Chocolate Log
Candied Citrus Peels
Easy Rum Balls
Homemade Marshmallows
Christmas Kiss Cookies
Tea Cookies

Other Holiday Cooking Ideas:
Snowflake Tortillas
Gingerbread House Decoration Ideas
Christmas Peep S'mores

Rocky Road Chocolate Log

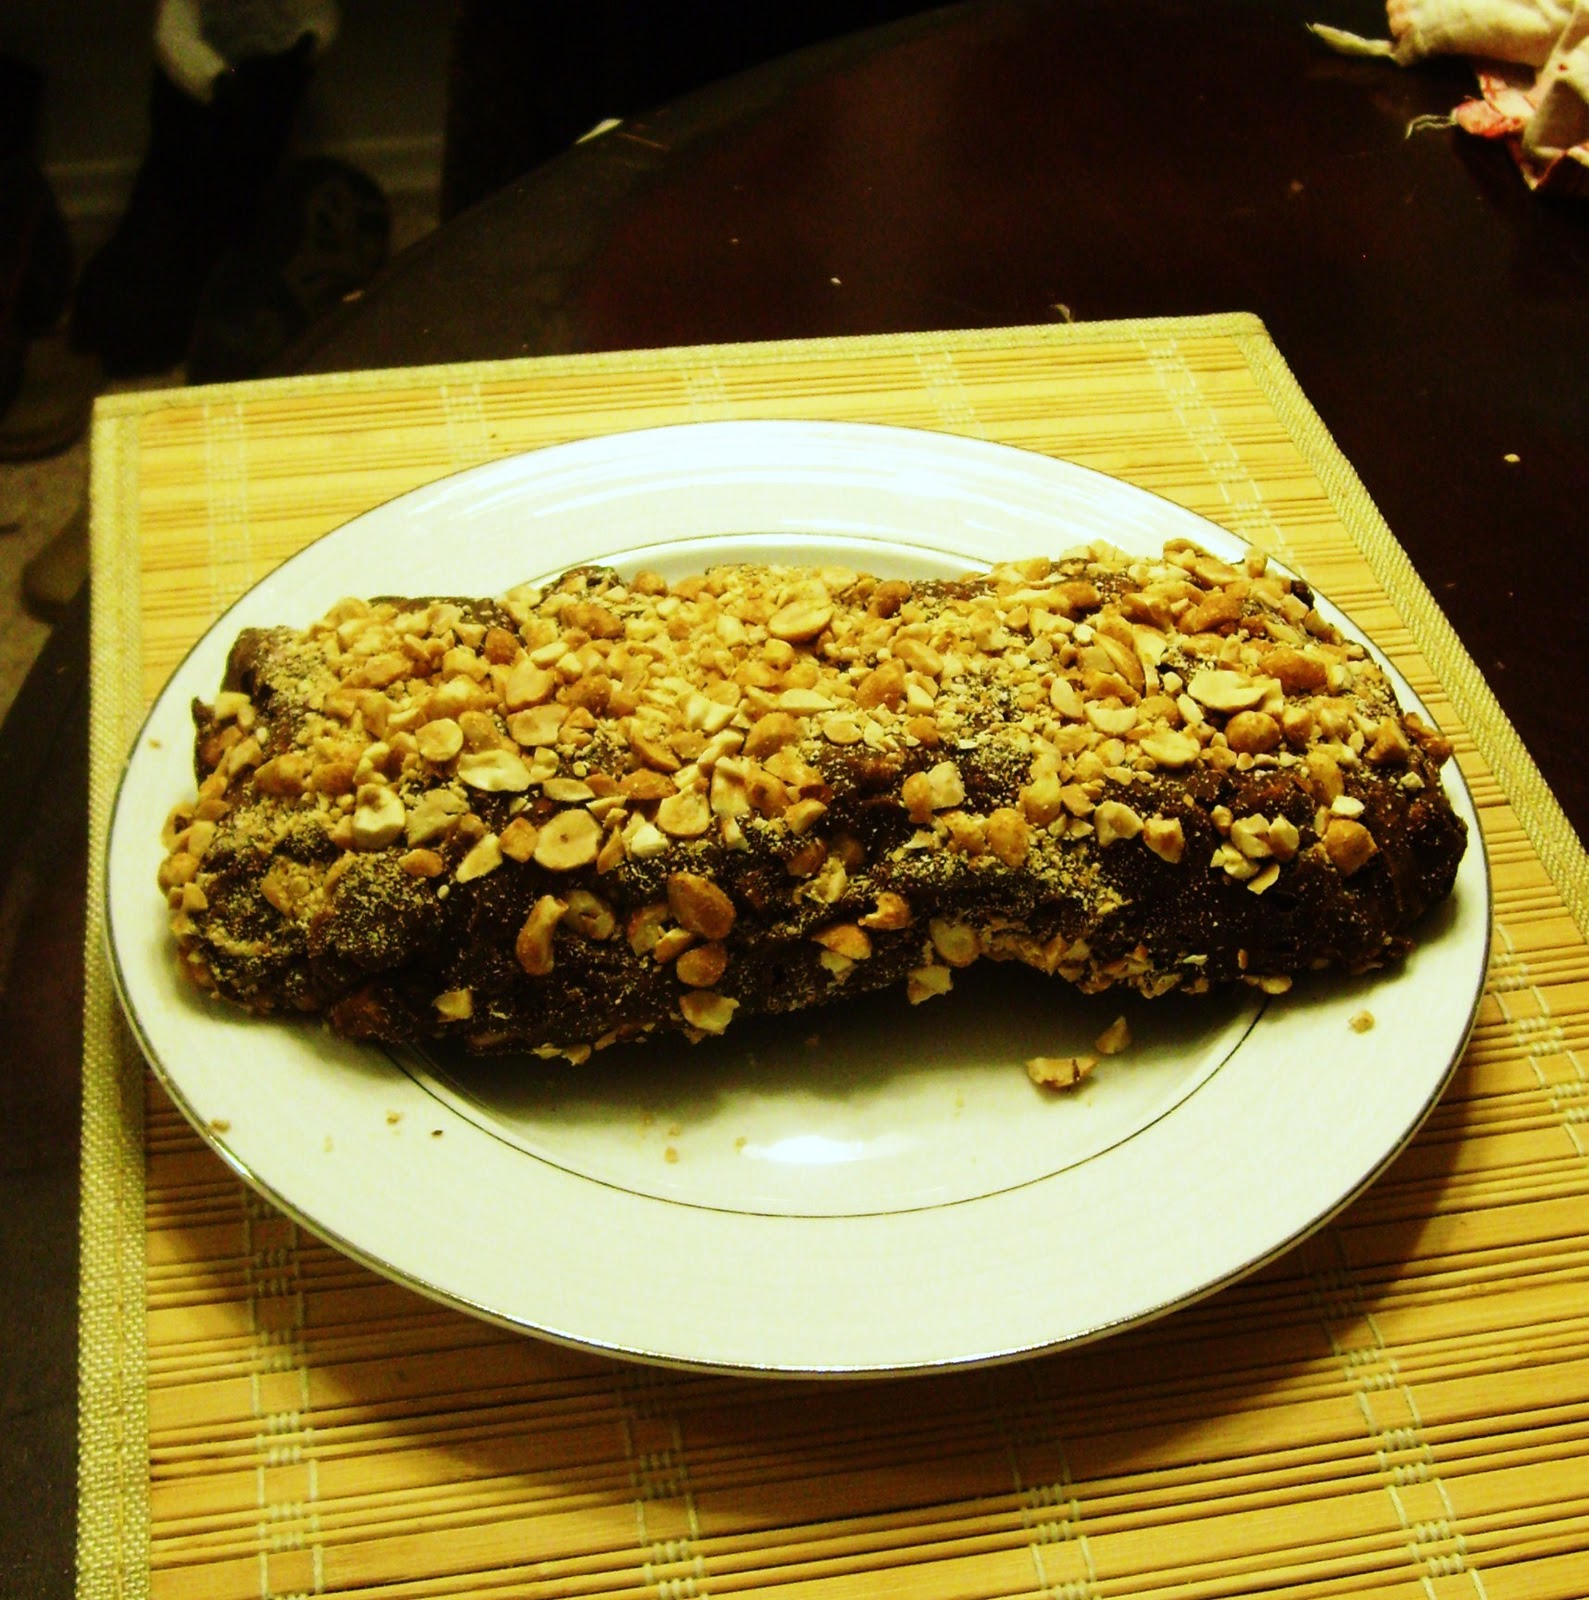
Chocolate, marshmallows, and nuts, who doesn't love rocky road? For me, winter and ice cream don't go together (Eric would disagree). So I found a way to get my rocky road fix this holiday season: make a chocolate log that can be cut into delicious nutty, marshmallow-y slices.

Fun Fact: Rocky road ice cream was created in March of 1929 by William Dreyer (co-founder of Edy's Grand Ice Cream along with Joseph Edy) when he used his wife's sewing scissors to cut up walnuts and marshmallows and then added them to his bowl of chocolate ice cream. Eventually the walnuts would be replaced by toasted almonds, sometimes peanuts. Dreyer and Edy gave the ice cream flavor its "rocky road" name in order to give people something to smile about during the Great Depression.

Rocky Road Chocolate Log Slices
Ingredients:
12-ounce bag of milk chocolate chips (we used Hershey's)
1/2 cup (1 stick) unsalted butter
1 1/2 cups mini marshmallows
1/2 cups coarsely chopped peanuts

Directions:
In a saucepan, melt the butter over medium heat. Remove from heat and add the chocolate chips. Stir until the chocolate is melted and smooth. Allow to cool for about 5 minutes. Stir in the marshmallows. Transfer chocolate to wax paper and shape into a log. Wrap in wax paper and refrigerate for about 30 minutes. Unwrap and press the peanut into the top of the log. If you want, you can roll the entire log in peanuts. I was lazy and just placed them on top. Re-wrap and store in refrigerator overnight. Slice the log and store in an air tight container.

Rocky Road Chocolate Log

Enjoy!

~Krissy

2011 Christmas Baking List:
Mint-Chocolate Truffles
Starlight Mint Cake
Sea Salt Caramels
Rocky Road Chocolate Log
Candied Citrus Peels
Easy Rum Balls
Homemade Marshmallows
Christmas Kiss Cookies
Tea Cookies

Other Holiday Cooking Ideas:
Snowflake Tortillas
Gingerbread House Decoration Ideas
Christmas Peep S'mores

Candied Citrus Peels

So this is one of the recipes that I added to my holiday baking list after I had supposedly finalized it. I came across the recipe on the Martha Stewart website and thought they looked fun and different and not too difficult. Made from oranges and lemons, they reminded me of gel candy fruit peels, which Eric loves. (They taste as awful lot like them too!) And they'd make a nice contrast to all the chocolate candy I was making. But the main reason I decided to make them: their color. One of the reason I love to cook and bake so much is because food appeals not only to taste and smell, but also sight, sound, and touch. What drew me to these candied citrus peels was simply how vibrant and pretty they looked. 

Candied orange and lemon peels
Ingredients:
2 large oranges
1 lemon
3 1/2 cups water
3 1/2 cups granulated sugar, plus extra for decorating

*You can also make these using grapefruits. We're just not grapefruit eaters.

Directions:
Cut six slits from the top of the fruit to the bottom. You only want to cut through the peel, not into the fruit. Gently remove each section of the peel using your fingers. Save the actual fruit for another purpose. Next, remove the white pith from the rinds. Eric did this part, and he found that the easiest way was to pretend you were flaying a fish. Once the pith has been removed, cut each peel into 1/4-inch wide strips.

In a large saucepan, cover the strips with cold water, bring to a boil, and then drain. Repeat this step two more times so you have boiled and drained the peels a total of three times. Set the peels aside.

Pour 3 1/2 cups of water and sugar into saucepan and boil until sugar is dissolved, stirring occasionally. Once sugar is dissolved, quit stirring. Place the strips into the boiling syrup and adjust heat to medium-low. Allow the peels to simmer until the strips become translucent, approximately 1 hour. Remove the pan from the heat and allow the peels to cool in the syrup.

Transfer the peels to a wire rack. Place a rimmed cookie sheet beneath the wire rack to catch the syrup drippings. Pat the strips with paper towels to remove any excess syrup. Roll the strips in granulated sugar and place on wax paper to to dry, about 30 minutes. 

Next year I think I'll add limes to the mix, just for that brilliant and Christmas-y green color.


Enjoy!

~Eric

2011 Christmas Baking List:
Mint-Chocolate Truffles
Starlight Mint Cake
Sea Salt Caramels
Rocky Road Chocolate Log
Candied Citrus Peels
Easy Rum Balls
Homemade Marshmallows
Christmas Kiss Cookies
Tea Cookies

Other Holiday Cooking Ideas:
Snowflake Tortillas
Gingerbread House Decoration Ideas
Christmas Peep S'mores